 Microsoft Azure
 Cloud Financial Management (FinOps)
 How to Operationalize FinOps
Introduction
In this tutorial, you will learn how to run your ECS cluster on Amazon EC2 Spot instances, using the Elastigroup ECS Creation Wizard.
Elastigroup lets you run ECS clusters on Spot instances, without having to manage the underlying servers.
Containerized applications in general and ECS services, in particular, are fault tolerant by nature, making them ideal candidates for Spot Instances. With Spot Instances, you can achieve substantial cost savings (up to 90%) without compromising on performance or availability. And with Spot Elastigroup, there is no need to provision, manage or scale instances – we take care of all that for you.
You are now minutes away from running your ECS cluster on Spot Instances. Let’s get started!
Prerequisites:
- A verified Spot Account.
- An ECS cluster.
In this guide, you will learn:
- Step 1: Open the ECS creation wizard
- Step 2: Import Cluster Configuration
- Step 3: Configure your cluster
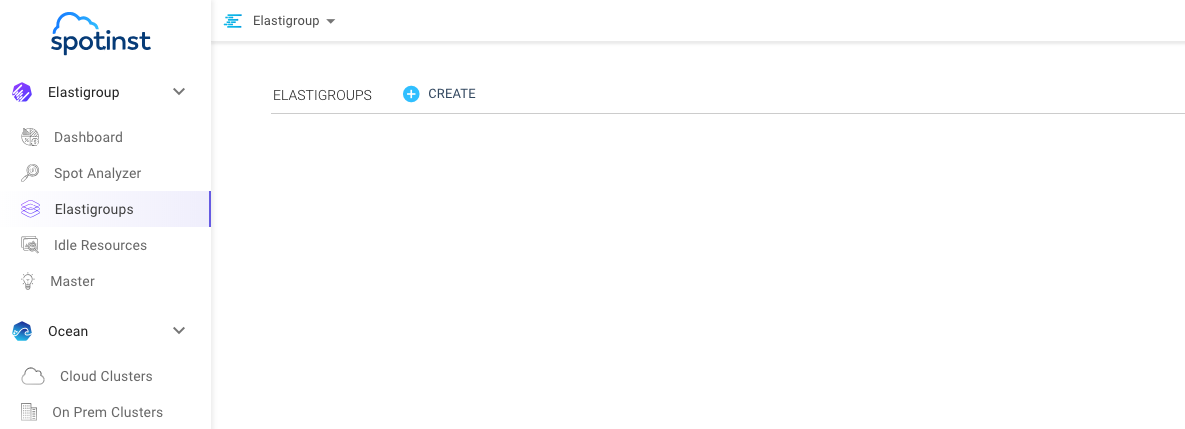
Step 1: Open the ECS creation wizard
Login to the Elastigroup Console (console.spotinst.com) and navigate to the Creation Wizard by clicking on the Create button in the Elastigroups tab.
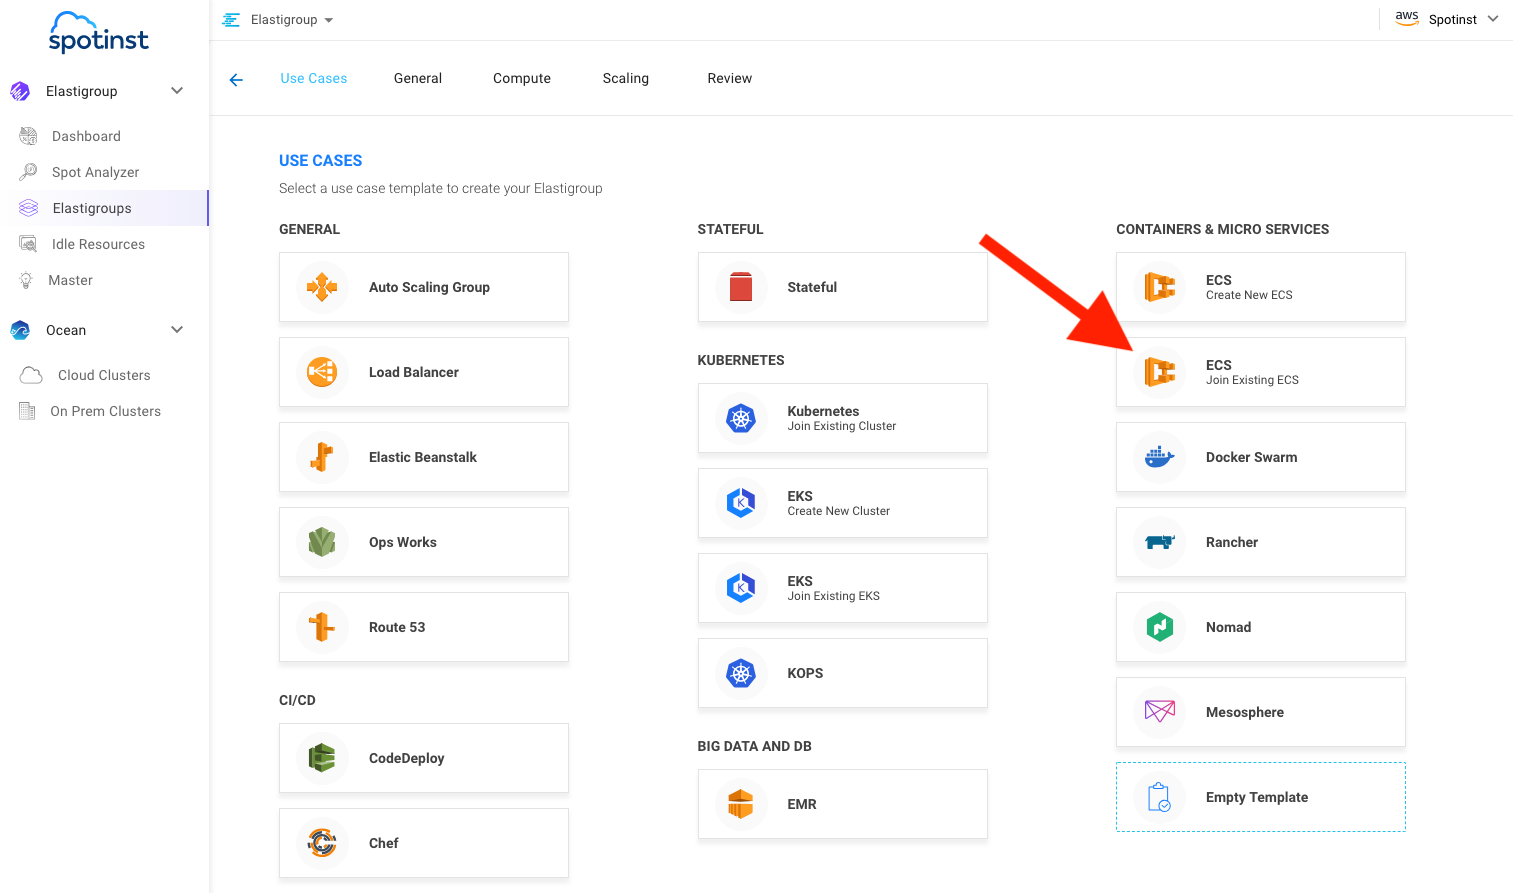
Then, choose ‘ECS – Join Existing ECS’ to launch the ECS creation wizard:
Step 2: Import Cluster Configuration
With Elastigroup, you can get started quickly by importing instance configuration from existing instances. Elastigroup will import instance configurations such as AMI, security groups, and VPC. For a full list of configurations imported by Elastigroup, visit our docs.
You can select an existing ECS cluster to import:
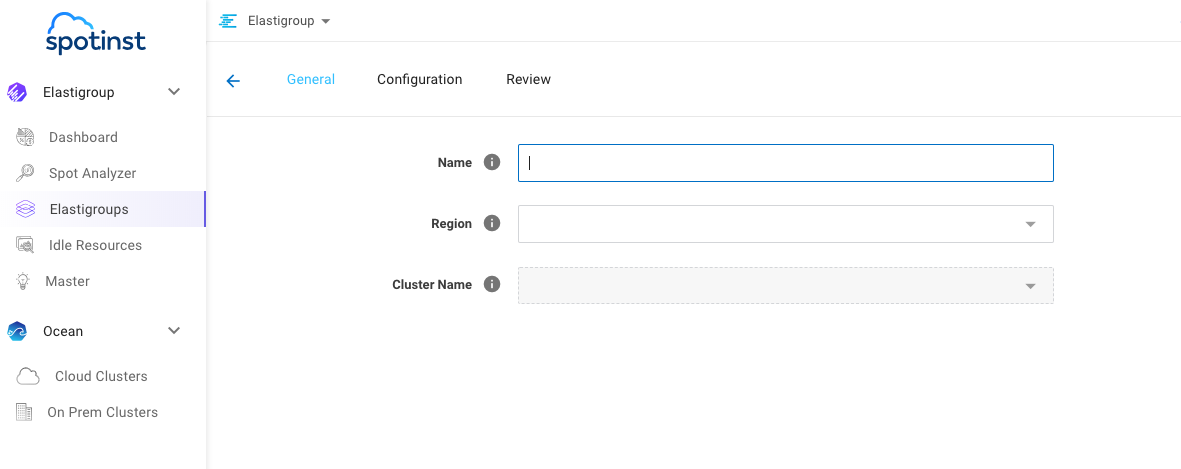
Once you’ve selected an ECS to import configuration from, click on ‘Next’
Step 3: Configure your cluster
In this step, all the current configurations of your existing ECS cluster are imported automatically and can be configured as follows:
cluster’s capacity:
- The ‘target’ is the initially desired number of instances.
- The ‘minimum’ is the low boundary for your cluster size. Elastigroup will not scale below the minimum you set.
- The ‘maximum’ is the high boundary for your cluster size. Elastigroup will not scale above the maximum you set.
Next, we will select multiple ‘Spot types’ – these are instance types that you deem suitable for your ECS cluster, based on the RAM and CPU that your applications are expected to consume.
Finally, you will need to select the availability zones and subnets in which your instances will be provisioned.
On the top right, you will find the Spot Market scoring. Spot’s proprietary algorithms take into account vast amounts of availability and pricing data in order to provide scores for each Spot market (between 0 and 100), based on the market’s attractiveness. Spot then uses these scores to ensure your instances are provisioned in the markets that are the most cost-effective, and the least likely to get interrupted.
NOTE: Each Spot market is a combination of an AZ and instance type. It is recommended to enable as many Spot markets as possible (i.e. add instance types or AZs) for optimal performance and minimize costs.

When done, press ‘Create’ on the bottom right of the screen.
Congratulations!
You have now learned how to create an ECS cluster on Spot instances with Spot, letting you:
- Cut your costs by up to 80%, while maintaining high availability.
- Run on spot instances with zero overhead, and no servers to manage – The Spot Elastigroup platform manages your infrastructure for you.
- Enjoy a Hands-free scaling experience – no need to define scaling policies; Spot Elastigroup will automatically scale your cluster up and down for optimized performance, and minimal costs.
Next Steps
Now that you have learned to deploy your ECS cluster on Spot Instances with Spot, try Spot for other workloads.