Introduction
In this tutorial, you’ll learn how to optimally run your Kubernetes cluster on AWS spot instances.
Spot instances allow cloud customers to purchase compute capacity at a significantly lower cost than on-demand or reserved instances. To learn more about spot instances, read this article.
Containerized appliances in general, and Kubernetes services, in particular, are fault tolerant by nature making them ideal candidates for spot instances. With spot instances, you can achieve substantial cost savings—up to 90%.
Ocean, a managed infrastructure service for containers from Spot, lets users run Kubernetes clusters on spot instances without having to manage the underlying servers. With Ocean, there is no need to provision or scale instances, and there’s no need to worry about bin packing containers on them in an optimized way. Ocean takes care of all of that for you.
Follow the instructions below to run your Kubernetes cluster on spot instances. You can connect to any type of managed or unmanaged Kubernetes cluster to Ocean.
In this guide, you will learn:
- Prerequisites
- Get Started
- Setup
- Compute configurations
- Deploy controller
- Create the cluster
- What’s next?
Prerequisites
- Verified Spot account. If you don’t have a Spot account, sign up for a free trial and get 20 instances to use.
- Kubernetes cluster up and running
Get Started
- Login into the Spot console and navigate to the left menu of the Spot console.
- Click Ocean → Cloud Clusters to view and create clusters.
- To create and configure a new cluster, click the button in the right corner.
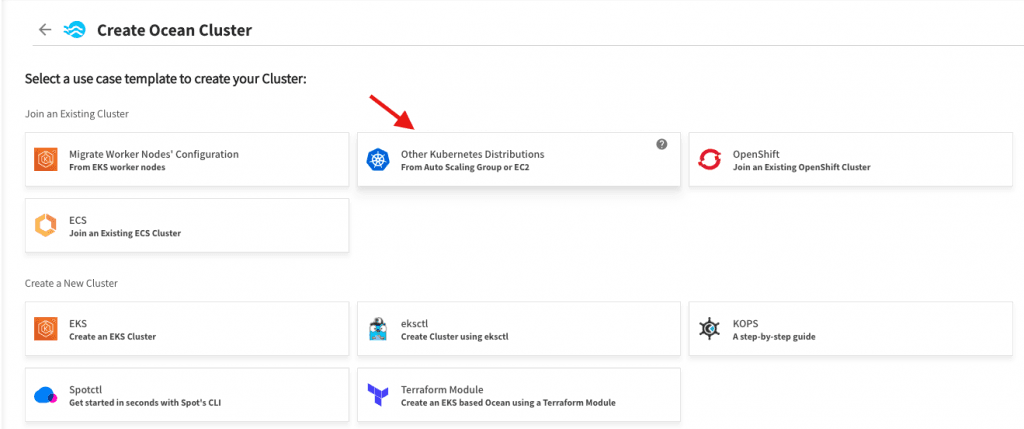
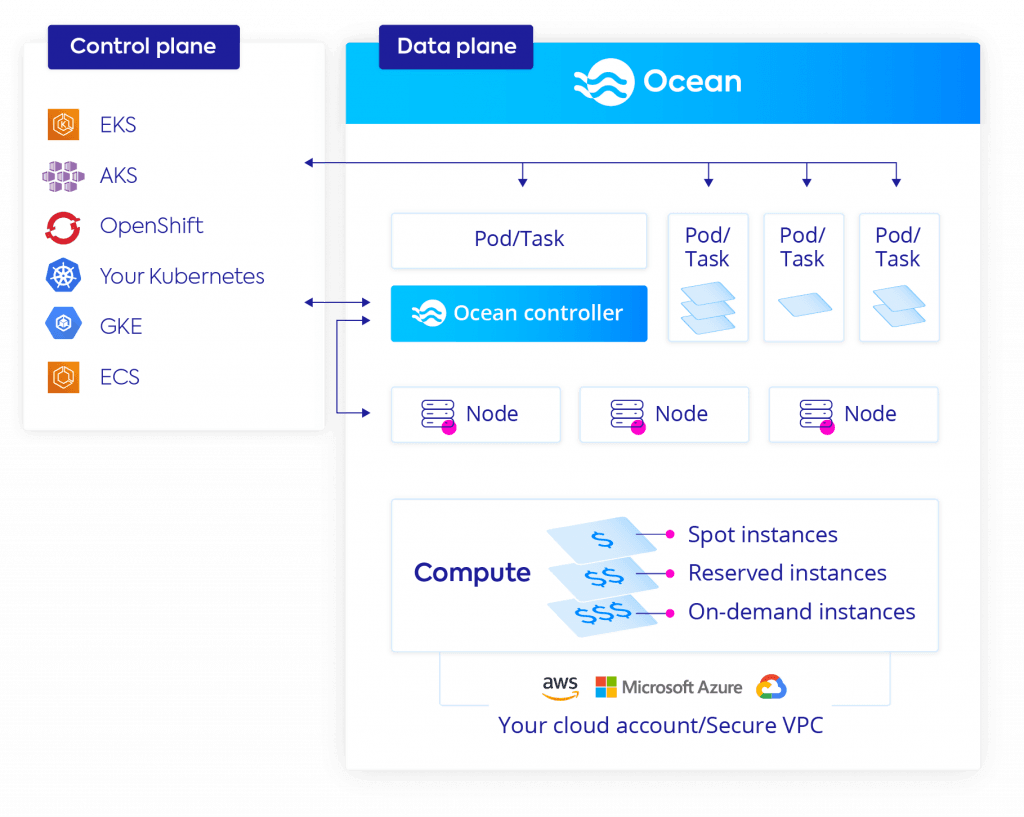
- Once on the cluster creation page, select the tile for the use case template “Other Kubernetes Distributions” under the Join an existing cluster section. Ocean optimizes the cluster’s data plane, and as such, is agnostic to nature of the control plane running the cluster.
Related content: Read our guide to kubernetes data plane.
Setup
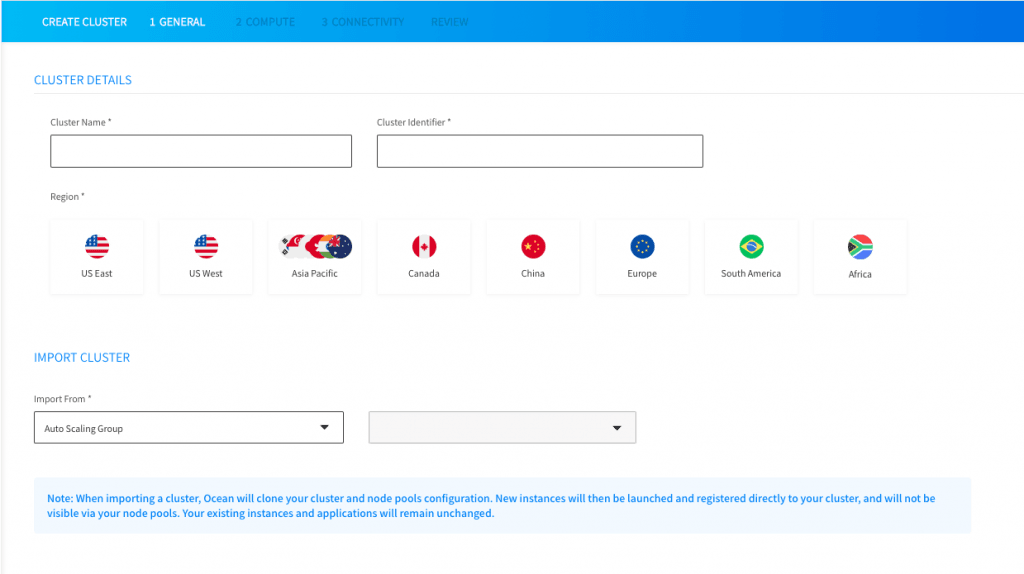
- On the cluster details page, you’ll input general information about your cluster.
- Cluster name: the names of the Ocean entity that will be created
- Cluster identifier: the unique key used to connect Ocean and the Kubernetes cluster
- Select the region in which the cluster is running
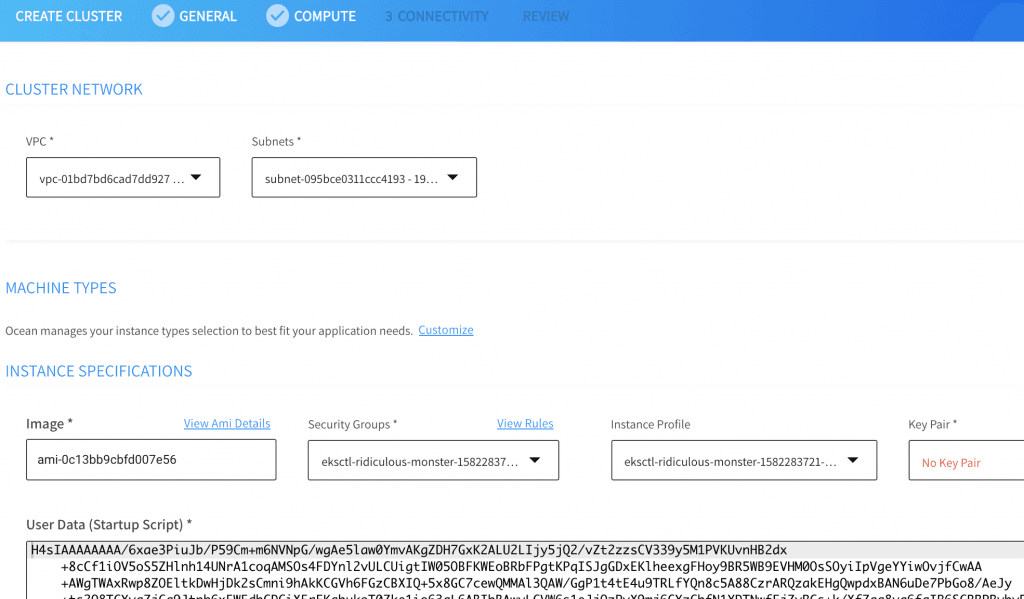
- Choose the autoscaling group or specific instance from which you’ll import the compute configurations to use later on when scaling. Ocean will import instance configurations such as AMI, security groups, and VPC.
- Click next.
Compute configurations
Ocean fetches all the metadata from your current workers, and displays the configurations on the compute page.
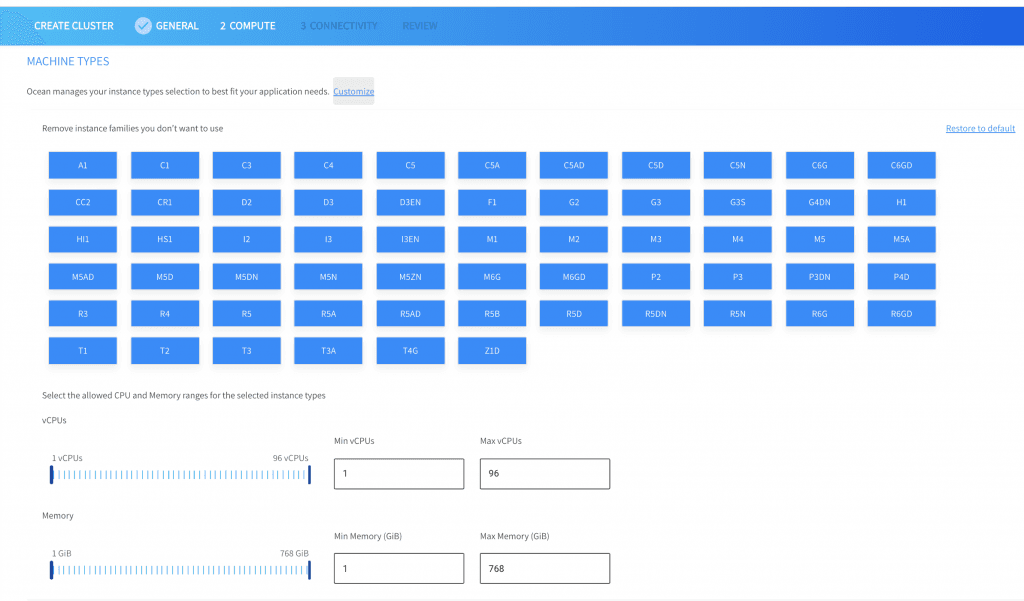
- Review, update and confirm compute configurations.
All possible machine types and sizes are selected automatically by Ocean to optimize your cluster, but you can delist instance families and limit the size of them should you need to make adjustments.
Deploy controller
Ocean manages your container infrastructure via one small operator inside your cluster. The connection allows Ocean to see the status of the cluster, its resources and communicate with your control plane.
Learn more in our detailed guide to kubernetes resource management.
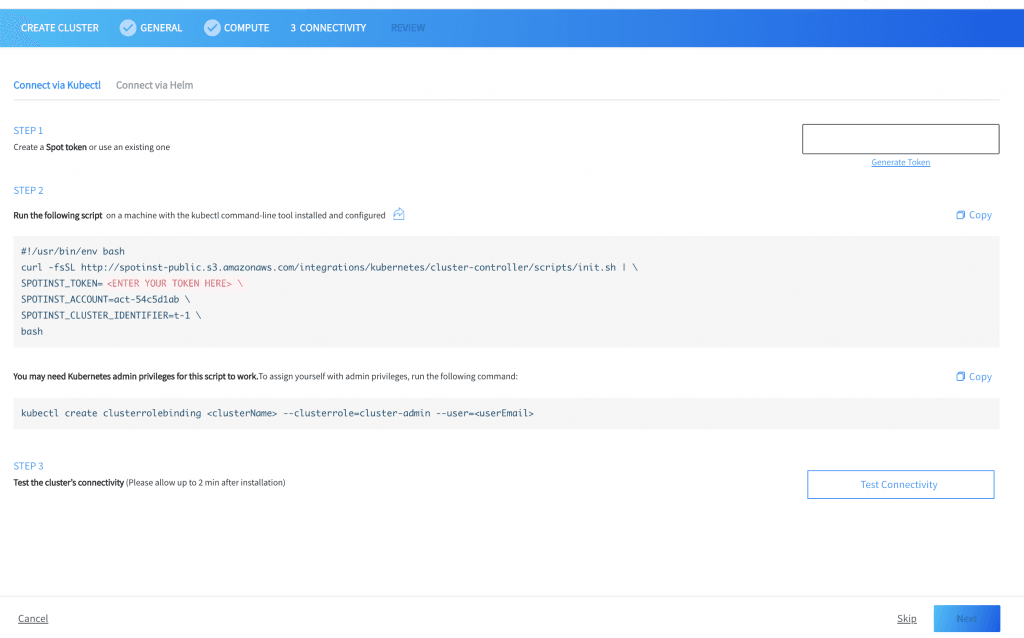
On the connectivity page, install the Spot Kubernetes controller.
- Create a Spot token (or use an existing one) and copy it to the text box.
- Use the kubectl command-line tool to install the Spot Controller Pod. Learn more about the Spot Controller Pod and Ocean’s anatomy here.
- Click Test Connectivity to ensure the controller functionality. Allow approximately two minutes for the test to complete.
- Click Next.
Create the cluster
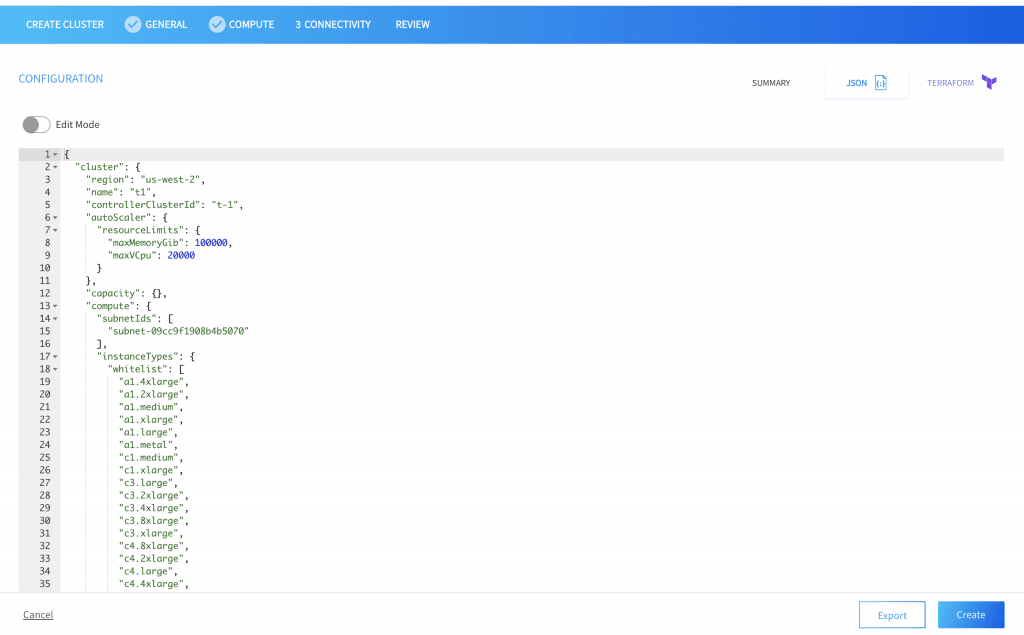
- Review configurations
- Click create to finish or select between JSON or Terraform generated templates to create the Ocean cluster using other tools.
Once this deployment is complete, you’re ready to optimize and orchestrate your cluster with Ocean:
- Run cluster across a variety of instance shapes and sizes
- Leverage the most optimal blend of spot, on-demand and reserved instances
- Get granular cost data on every namespace and deployment running in the cluster
What’s next?
Migrate your Workloads to Ocean, and de facto replace any on-demand instances previously existing in the cluster with spot instances managed by Ocean.
Learn more
From container-driven auto scaling to right sizing, Ocean offers many powerful features to handle the day-to-day management of your Kubernetes infrastructure. To learn more, read our technical overview of Ocean.


