 Microsoft Azure
 Cloud Financial Management (FinOps)
 How to Operationalize FinOps
What Is the EC2 API?
The Amazon EC2 API allows developers to interact with Amazon’s Elastic Compute Cloud (EC2) service programmatically. Using this API, users can launch virtual servers, manage storage, configure networks, and scale resources up or down based on demands. It provides the flexibility to control a range of computing resources in the cloud.
This API communicates over HTTPS and follows a request-response model. Developers can use actions in the API to create, monitor, and manage their instances and other resources. Through EC2 API calls, users can automate tasks and build applications that are scalable and resilient, leveraging the vast capabilities of the AWS cloud environment.
This is part of a series of articles about EC2 Instances.
In this article:
- EC2 API: Required Knowledge
- Understanding Query Requests for Amazon EC2
- Request Throttling for the Amazon EC2 API
- Quick Tutorial: Managing Amazon EC2 Instances in Python
EC2 API: Required Knowledge
To use the Amazon EC2 API, developers must have knowledge of the following areas.
XML
XML (eXtensible Markup Language) is necessary for working with the EC2 API because many response data formats are XML. Understanding XML structure and schemas allows developers to parse and utilize the information returned by API calls effectively. XML namespaces, elements, and attributes are critical for processing the detailed response data.
Web Services
The EC2 API is a collection of RESTful web services, which enable the API to communicate over the Internet, allowing users to perform operations remotely. Knowledge of how web services work includes understanding the protocols such as SOAP or REST, and how they facilitate communication between clients and servers across different platforms.
HTTP Requests
Understanding the structure of an HTTP request, including methods like GET and POST, headers, and the body, is important for making API calls. Knowledge of HTTP status codes and what they represent helps in interpreting responses and handling errors efficiently.
Supported Programming Languages
While the API can be accessed using any language that can make HTTP requests, familiarity with languages that have AWS SDKs, such as Python, Java, or JavaScript, is beneficial. These SDKs abstract some of the complexities involved in making direct API calls.
Understanding Query Requests for Amazon EC2
Structure of the GET Request
A GET request for the Amazon EC2 API is designed as a URL that can be entered directly into a web browser.
Here’s an example of a GET request to launch EC2 instances:
https://ec2.amazonaws.com/?Action=RunInstances
&ImageId=ami-2bb65342
&MaxCount=3
&MinCount=1
&Placement.AvailabilityZone=us-east-1a
&Monitoring.Enabled=true
&Version=2016-11-15
&X-Amz-Algorithm=AWS4-HMAC-SHA256
&X-Amz-Credential=AKIDEXAMPLE/20130813/us-east-1/ec2/aws4_request
&X-Amz-Date=20130813T150206Z
&X-Amz-SignedHeaders=content-type;host;x-amz-date
&X-Amz-Signature=525d1a96c69b5549dd78dbbec8efe264102288b83ba87b7d58d4b76b71f59fd2
This request comprises several key components: the endpoint, action, parameters, version, and authorization parameters. Here’s a detailed breakdown:
- Endpoint: The URL that serves as the entry point for the web service. For Amazon EC2, this is typically in the form of
https://ec2.amazonaws.com. - Action: Specifies the operation you want to perform. For instance, to launch an instance, you would use
Action=RunInstances. - Parameters: These are additional details required by the action. Each parameter is separated by an ampersand (&). Common parameters include
ImageId, MaxCount, MinCount,andPlacement.AvailabilityZone. - Version: Indicates the API version to use. For example,
Version=2016-11-15. - Authorization Parameters: Ensure the request’s validity and authenticity. Amazon EC2 supports Signature Version 2 and Signature Version 4, with Signature Version 4 being recommended. These parameters include elements like
X-Amz-Algorithm, X-Amz-Credential, X-Amz-Date,andX-Amz-Signature. - Optional Parameters: These can include parameters like DryRun to check if the user has the required permissions without actually performing the action, and
SecurityTokenfor temporary security credentials.
Query Parameters
Query requests must include common parameters for authentication and action selection. Parameters are case-sensitive and can include lists using the param.n notation.
For example, a request to run instances with multiple block device mappings may look like:
http://ec2.amazonaws.com/?Action=RunInstances
&ImageId=ami-72aa081b
&BlockDeviceMapping.1.DeviceName=/dev/sdj
&BlockDeviceMapping.1.Ebs.NoDevice=true
&BlockDeviceMapping.2.DeviceName=/dev/sdh
&BlockDeviceMapping.2.Ebs.VolumeSize=300
&BlockDeviceMapping.3.DeviceName=/dev/sdc
&BlockDeviceMapping.3.VirtualName=ephemeral1
&AUTHPARAMS
Query API Authentication
Amazon EC2 supports Signature Versions 2 and 4 for request authentication, with Signature Version 4 recommended. A signature must be included in every query request, ensuring secure communication.
For example, a Signature Version 4 request may include headers like:
Content-Type: application/x-www-form-urlencoded; charset=UTF-8
X-Amz-Date: 20130813T150211Z
Host: ec2.amazonaws.com
Authorization: AWS4-HMAC-SHA256 Credential=AKIDEXAMPLE/20230813/us-east-1/ec2/aws4_request, SignedHeaders=content-type;host;x-amz-date, Signature=ced6826de92d2bdeed8f846f0bf508e8559e98e4b0194b84example54174deb456c
Query Response Structures
The responses to query requests are XML data structures defined by the Amazon EC2 XML schema. Each response includes a unique request ID for tracking purposes. The response structure varies based on the request type, with container elements (e.g., groupSet for security groups) and item elements detailing specific data. For example, a response to DescribeKeyPairs might look like:
<DescribeKeyPairsResponse xmlns="http://ec2.amazonaws.com/doc/2016-11-15/">
  <requestId>7a62c49f-347e-4fc4-9331-6e8eEXAMPLE</requestId>
  <keySet>
    <item>
      <keyName>gsg-keypair</keyName>
      <keyFingerprint>00:00:00:00:00:00:00:00:00:00:00:00:00:00:00:00:00:00:00:00</keyFingerprint>
    </item>
  </keySet>
</DescribeKeyPairsResponse>
Pagination
For actions that return long lists of items, such as DescribeInstances, the EC2 API uses pagination parameters: MaxResults, NextToken (input), and nextToken (output). Pagination helps manage large data sets by limiting the number of items per call. Developers should continue calling the action with the NextToken parameter until nextToken is null.
Related content: Read our guide to aws ec2 logs.
Request Throttling for the Amazon EC2 API
Amazon employs request throttling for the EC2 API to maintain service reliability and performance. Throttling limits the number of requests a user can make within a given timeframe, preventing undue strain on the system.
Developers need to be aware of throttling mechanisms and incorporate retry logic in their applications. This includes handling HTTP 429 error responses and implementing exponential backoff strategies to respect service limits while ensuring reliable application performance.
Quick Tutorial: Managing Amazon EC2 Instances in Python
Here’s a walkthrough of how to manage instances using the EC2 API. This is based on the official Amazon Boto3 documentation (Amazon’s Python SDK).
Prerequisites: Install boto3, make sure you have an AWS account and API credentials are stored on your machine.
Describing Instances
The EC2 API provides functionality to describe one or more EC2 instances, giving developers the ability to retrieve details about the virtual servers running in the Amazon EC2 environment. This can include various details about instance configurations, the state of instances, and more. The following Python code snippet uses the AWS SDK for Python (Boto3) to make a call to describe_instances:
import boto3
import pprint
# Create an EC2 client using Boto3
ec2 = boto3.client('ec2')
# Call the describe_instances method to retrieve information about EC2 instances
response = ec2.describe_instances()
# Print the details of the instances obtained from the describe_instances response
pprint.pp(response)
In this example, the describe_instances method is called on an EC2 client object created by Boto3. The response from this call will contain all the details about the instances that can be printed out or further processed:

Monitoring Instances
Monitoring instances is crucial for maintaining the performance and health of applications running on EC2. AWS offers two types of monitoring: basic and detailed. The following examples demonstrate how to enable or disable detailed monitoring for an instance using the Boto3 library.
import sys
import boto3
Import pprint

# Create an EC2 client using Boto3
ec2 = boto3.client('ec2')
# Check if the first command-line argument is 'ON' to enable monitoring, otherwise disable it
if len(sys.argv[1]) > 1 and sys.argv[1] == 'ON':
    # Enable detailed monitoring for the specified instance by calling monitor_instances
    response = ec2.monitor_instances(InstanceIds=['INSTANCE_ID'])
else:
    # Disable detailed monitoring for the specified instance by calling unmonitor_instances
    response = ec2.unmonitor_instances(InstanceIds=['INSTANCE_ID'])
# Print the response to show the monitoring state change result
pprint.pp(response)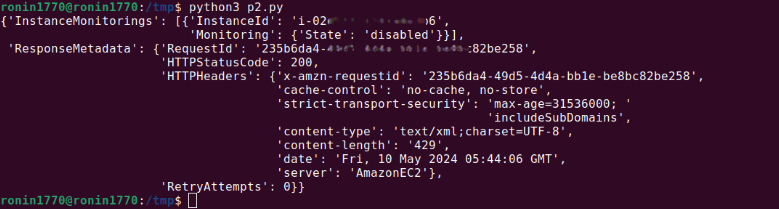
This script takes a command-line argument to either enable (ON) or disable monitoring. The instance IDs that need to be monitored are passed as an argument to monitor_instances or unmonitor_instances methods, which are then executed based on the provided input.
Starting and Stopping Instances
Instances using Amazon EBS volumes as their root devices can be stopped and started. Stopping an instance frees up the compute resources and stops billing for those resources, but storage costs for the EBS volume still apply. Restarting an instance incurs billing as if a new instance hour starts.
import sys
import boto3
from botocore.exceptions import ClientError
import pprint

# Read command-line inputs: action (ON or OFF) and instance ID
instance_id = sys.argv[2]
action = sys.argv[1].upper()
# Create an EC2 client using Boto3
ec2 = boto3.client('ec2')

if action == 'ON':
    try:
        # Perform a dry run to check if starting instances is allowed
        ec2.start_instances(InstanceIds=[instance_id], DryRun=True)
    except ClientError as e:
        # If the dry run indicates a lack of permission, raise an exception
        if 'DryRunOperation' not in str(e):
            raise
    try:
        # Start the specified instance if the dry run succeeds
        response = ec2.start_instances(InstanceIds=[instance_id], DryRun=False)
        pprint.pp(response)
    except ClientError as e:
        # Print any errors that occur while starting the instance
        print(e)
else:
    try:
        # Perform a dry run to check if stopping instances is allowed
        ec2.stop_instances(InstanceIds=[instance_id], DryRun=True)
    except ClientError as e:
        # If the dry run indicates a lack of permission, raise an exception
        if 'DryRunOperation' not in str(e):
            raise
    try:
        # Stop the specified instance if the dry run succeeds
        response = ec2.stop_instances(InstanceIds=[instance_id], DryRun=False)
        pprint.pp(response)
    except ClientError as e:
        # Print any errors that occur while stopping the instance
        print(e)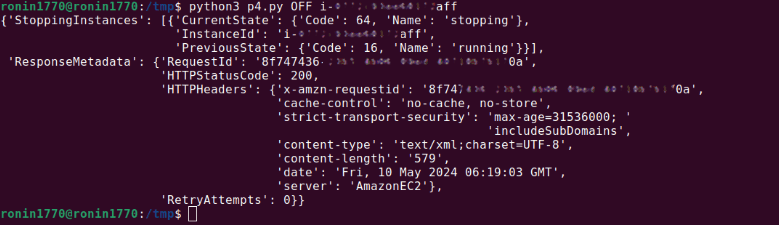
This script allows the user to start or stop an instance based on command-line inputs. It first performs a DryRun to check permissions without making changes, then proceeds to apply the action if permissions are valid.
Rebooting Instances
Rebooting an instance is another administrative function available through the EC2 API. This operation is asynchronous, meaning it queues the reboot request but does not wait for completion.
import boto3
from botocore.exceptions import ClientError

# Create an EC2 client using Boto3
ec2 = boto3.client('ec2')

try:
    # Perform a dry run to check if rebooting instances is allowed
    ec2.reboot_instances(InstanceIds=['INSTANCE_ID'], DryRun=True)
except ClientError as e:
    # If the dry run indicates a lack of permission, notify the user and raise an exception
    if 'DryRunOperation' not in str(e):
        print("You don't have permission to reboot instances.")
        raise

try:
    # Reboot the specified instance if the dry run succeeds
    response = ec2.reboot_instances(InstanceIds=['INSTANCE_ID'], DryRun=False)
    print('Success', response)
except ClientError as e:
    # Print any errors that occur while rebooting the instance
    print('Error', e)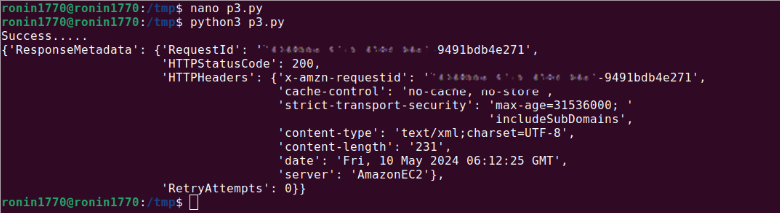
This example attempts to reboot specified instances, first checking permissions with a DryRun and then executing the reboot if allowed. This ensures that the instances are correctly rebooted while handling potential errors effectively.
Learn more in our detailed guide to ec2 instance types.
Automating AWS Cost Savings with Spot
While AWS offers Savings Plans, RIs and spot instances for reducing EC2 cost, these all have inherent challenges:
- Spot instances can be 90% less expensive than on-demand instances, however, as spare capacity, AWS can reclaim those instances with just a two minute warning, making them less than ideal for production and mission-critical workloads.
- AWS Savings Plans and RIs can deliver up to 72% cost savings, but they do create financial lock-in for 1 or 3 years and if not fully utilized can end up wasting money instead of saving it.
Spot addresses these challenges, allowing you to reliably use spot instances for production and mission-critical workloads as well as enjoy the long-term pricing of RIs without the risks of long-term commitment.
Key features of Spot’s cloud financial management suite include:
- Predictive rebalancing—identifies spot instance interruptions up to an hour in advance, allowing for graceful draining and workload placement on new instances, whether spot, reserved or on-demand.
- Advanced auto scaling—simplifies the process of defining scaling policies, identifying peak times, automatically scaling to ensure the right capacity in advance.
- Optimized cost and performance—keeps your cluster running at the best possible performance while using the optimal mix of on-demand, spot and reserved instances.
- Enterprise-grade SLAs—constantly monitors and predicts spot instance behavior, capacity trends, pricing, and interruption rates. Acts in advance to add capacity whenever there is a risk of interruption.
- Serverless containers—allows you to run your Kubernetes and container workloads on fully utilized and highly available compute infrastructure while leveraging spot instances, Savings Plans and RIs for extreme cost savings.
- Intelligent and flexible utilization of AWS Savings Plans and RIs—ensures that whenever there are unused reserved capacity resources, these will be used before spinning up new spot instances, driving maximum cost-efficiency. Additionally, RIs and Savings Plans are fully managed from planning and procurement to offloading unused capacity when no longer needed, so your long-term cloud commitments always generate maximum savings.
- Visibility and recommendations—lets you visualize all your cloud spend with the ability to drill-down based on the broadest range of criteria from tags, accounts, services to namespaces, annotations, labels, and more for containerized workloads as well as receive cost reduction recommendations that can be implemented in a few clicks.