 Microsoft Azure
 Cloud Financial Management (FinOps)
 How to Operationalize FinOps

If you are familiar with Spot Ocean, you may already know how quickly you start realizing the value it generates. Ocean offers automation and optimization of container workloads, while providing enterprise-grade service. Today we are glad to share that you can start realizing the value even faster, with Ocean’s new creation wizard. Ocean’s creation wizard is designed to simplify and accelerate setting up Elastic Kubernetes Service (EKS) clusters with Spot Ocean. It offers a straightforward and user-friendly interface that guides users through each step, ensuring a seamless onboarding experience, so you can begin automating, optimizing, and saving on EKS clusters within minutes.
Key features of the creation wizard include:
- Automatic discovery of node pools: The new creation wizard automatically detects all your node pool configurations. Then, you can easily decide which node pools you wish to import and whether you wish to update any configuration. This reduces the time of manually importing node pools one by one. By the way, Spot only imports the configurations, so you can safely use “workload migration” to have a graceful migration of the workloads once Ocean and all of the virtual node groups (VNGs) are in place.
- Guided configuration steps: Instead of grappling with extensive documentation or searching for external resources, the creation wizard provides a step-by-step process for configuring the Ocean EKS cluster. At each step, you receive a detailed explanation of what to do as well as links to documentation on best practices.
- Terraform ready: Use the UI to configure Ocean clusters quickly. Then use the full Terraform resource, which includes both Ocean resource and the VNGs resources, to have the template ready to use in Terraform. In addition, you can create Ocean clusters using the UI, and then use the import Ocean into Terraform to import the state.
5 simple steps to import EKS clusters into Spot Ocean
1. Choose which cluster to import
In this step you choose the region and the EKS cluster to import.

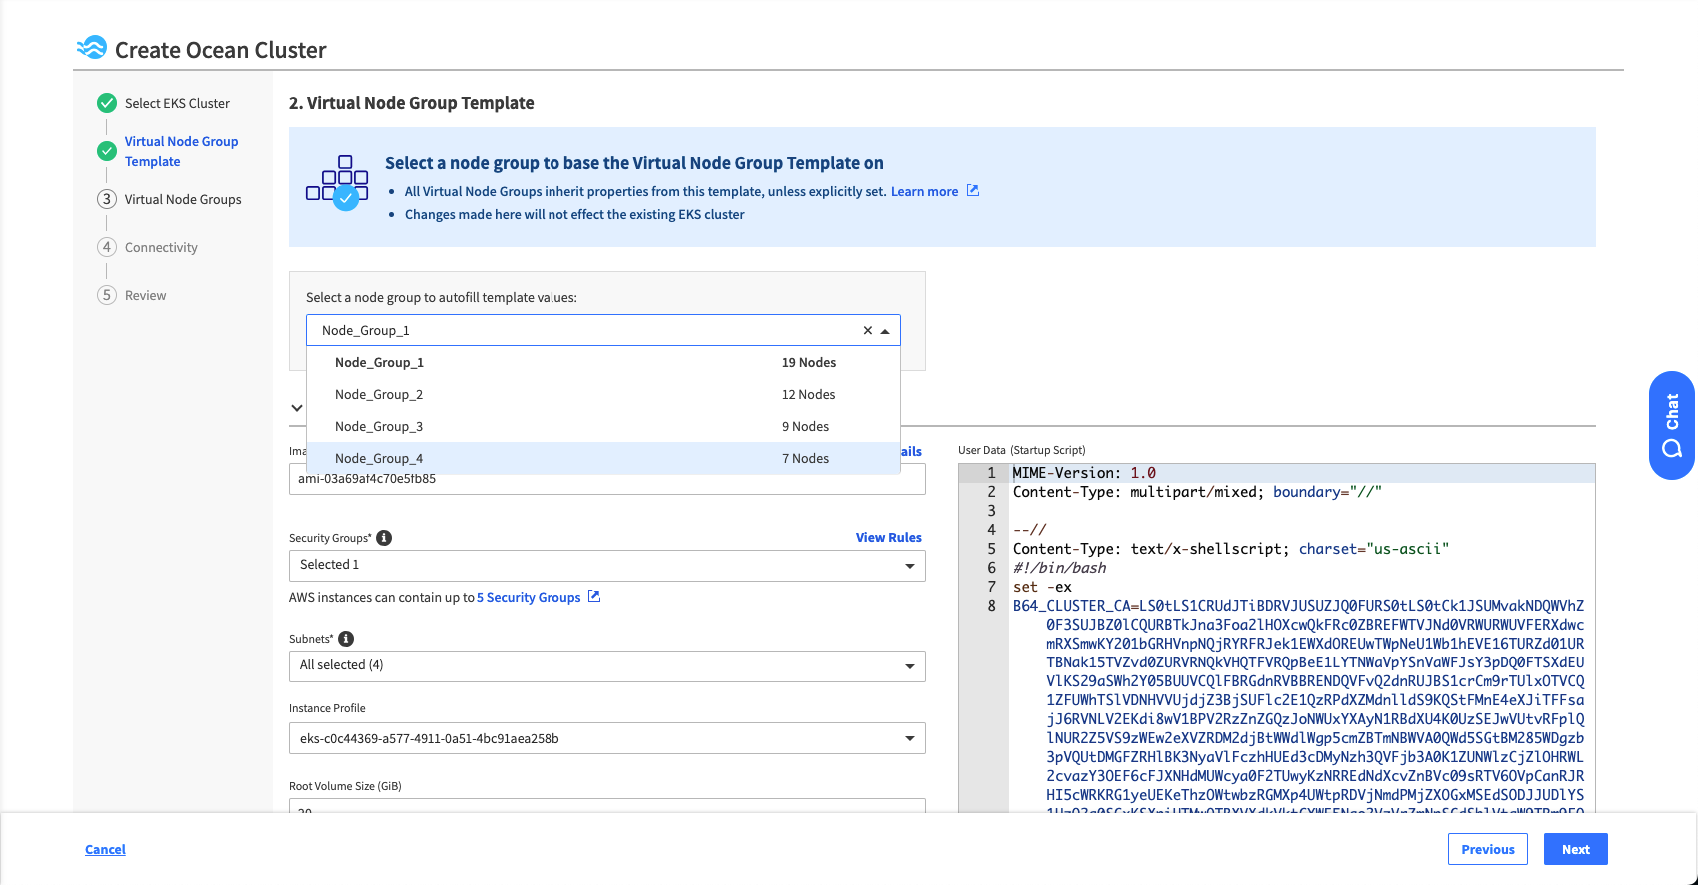
2. Set the default configurations for your nodes
The default configurations can be taken from any node pool in your EKS cluster.
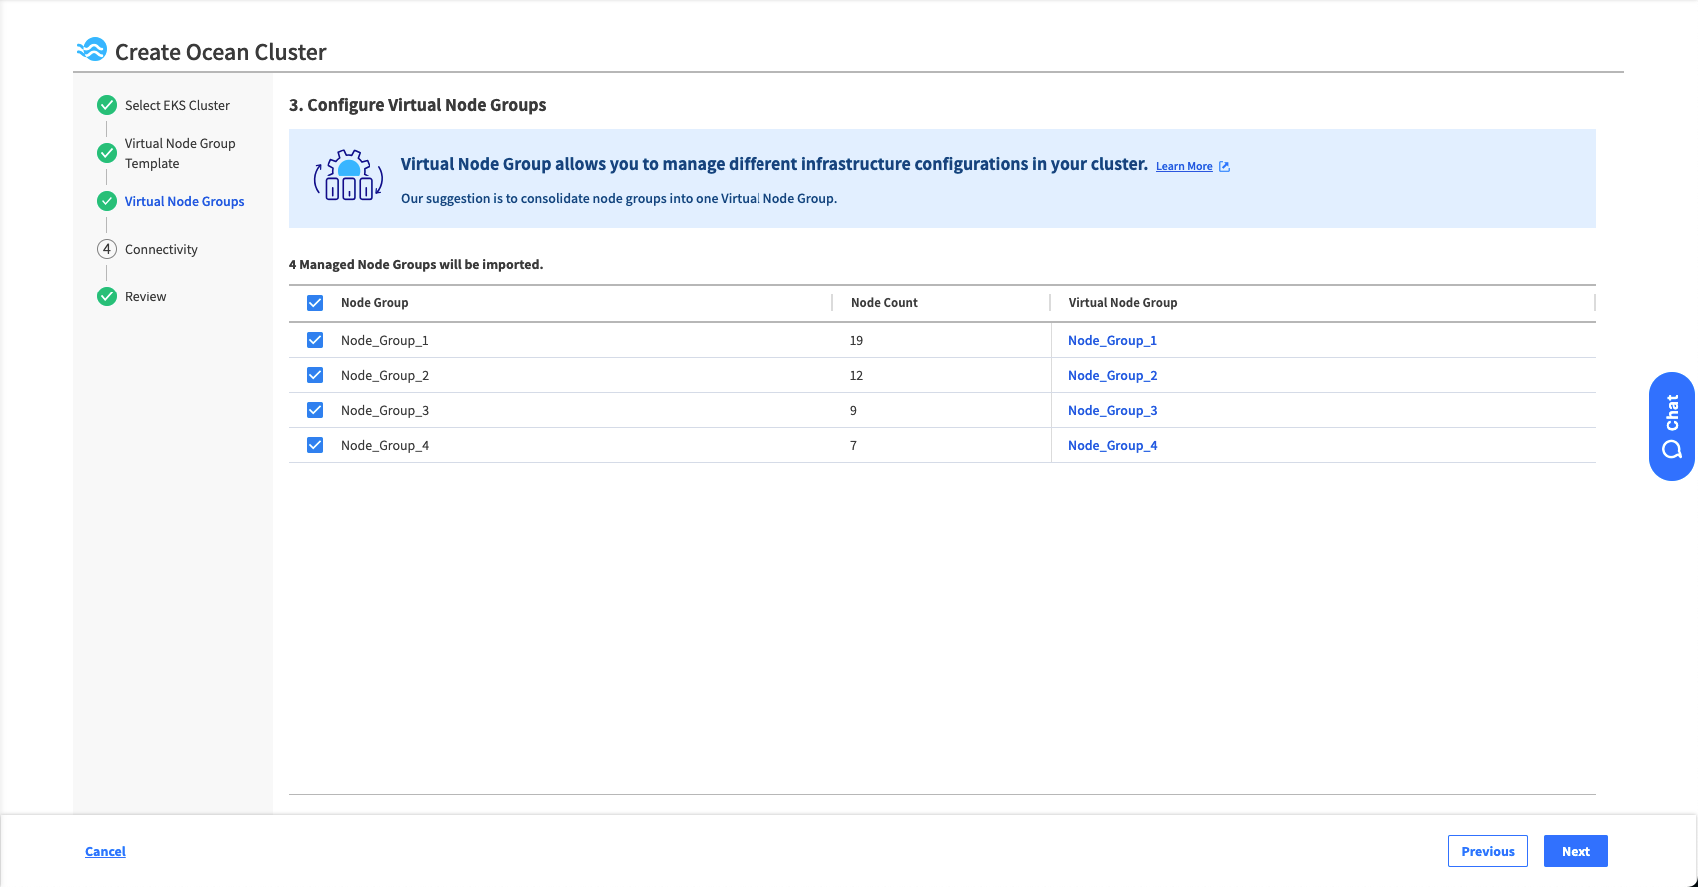
3. Select node groups to import
As a best practice, in case the only difference between the node pools is instance types or whether the node pool is running on-demand or on spot instances, you can import only one node group to manage fewer VNGs.
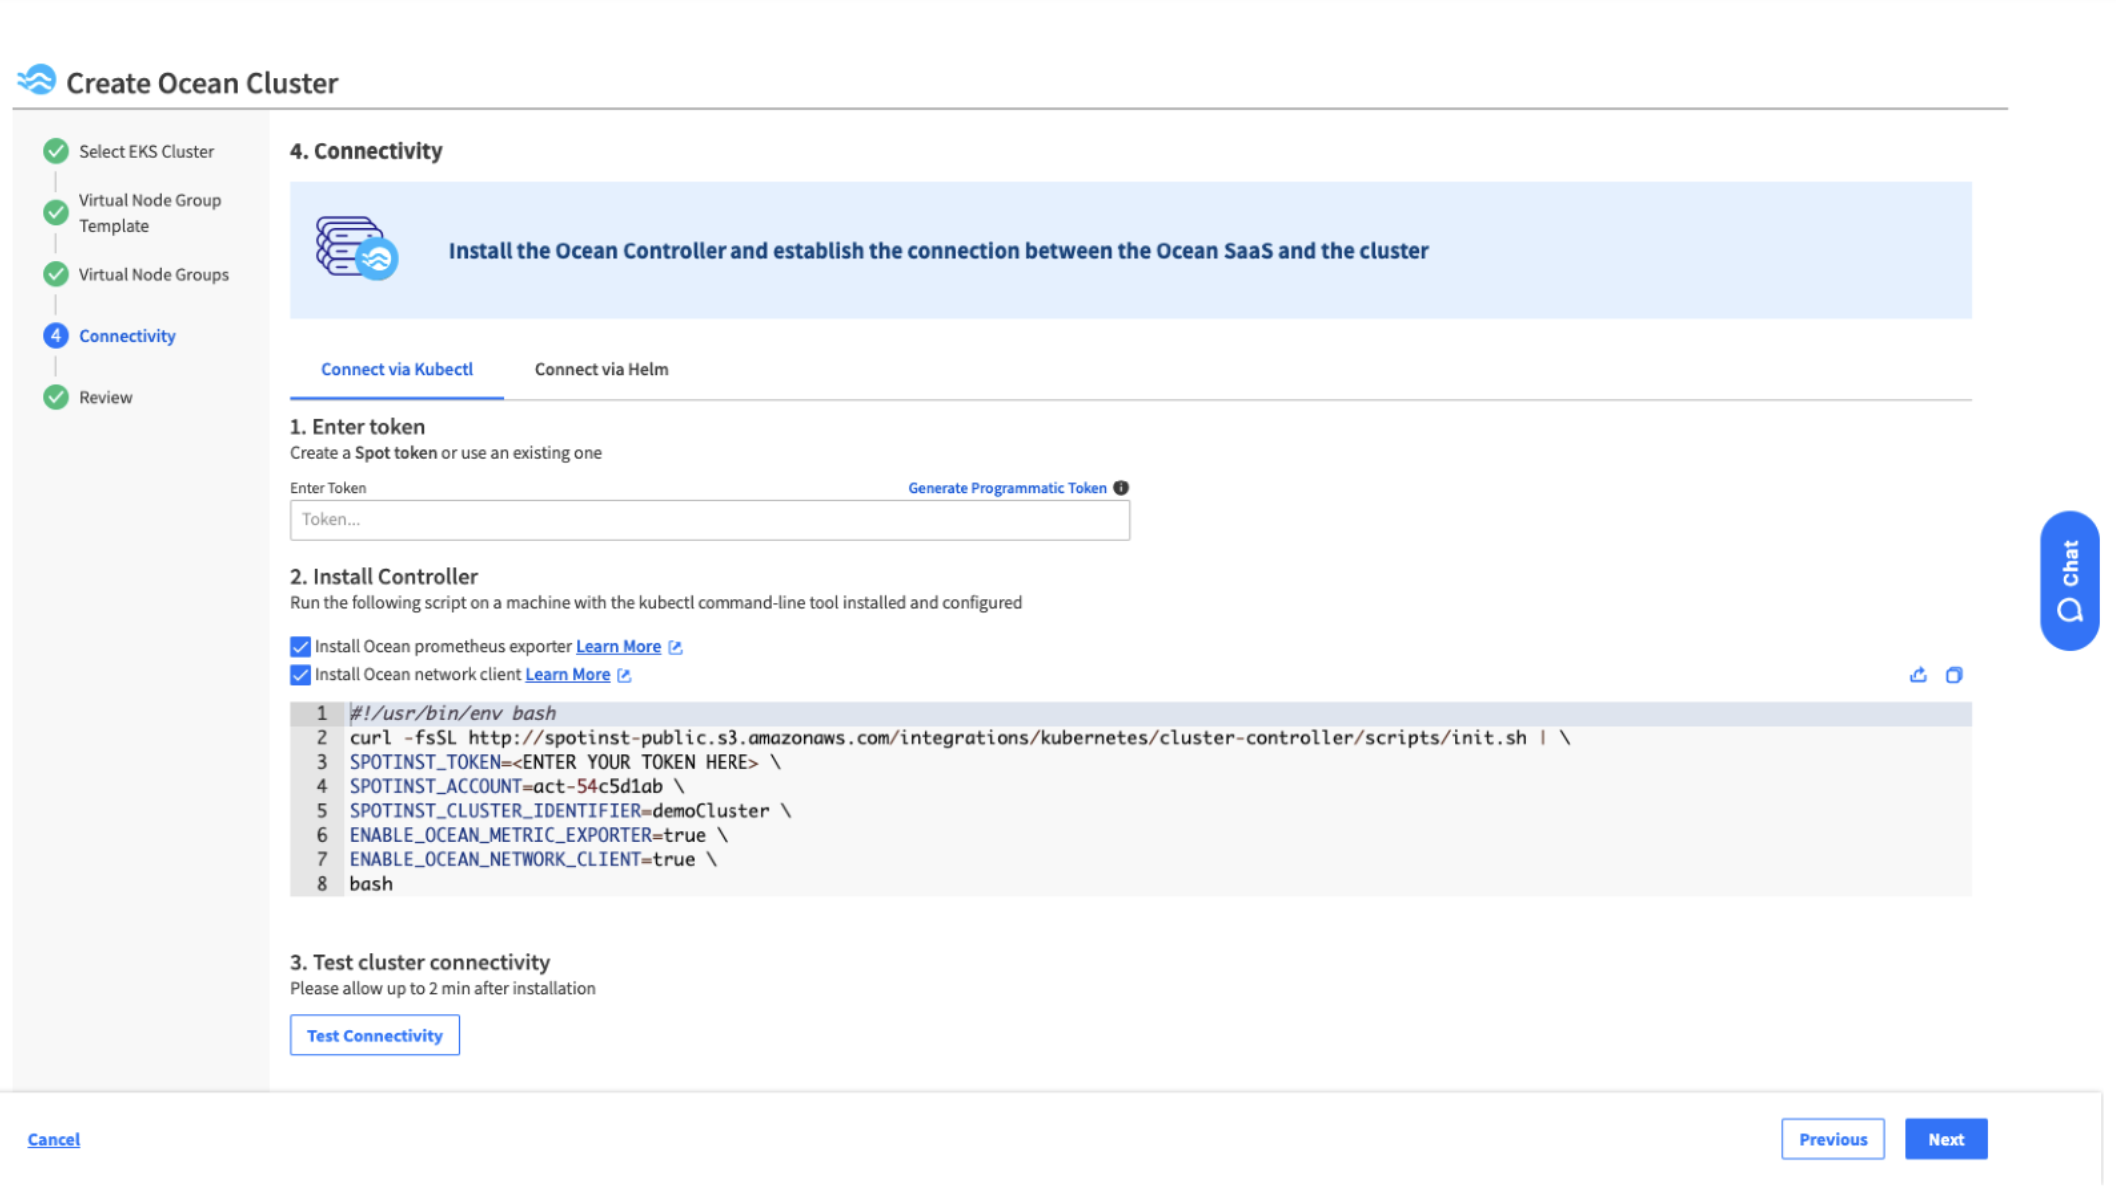
4. Install controller
Install the controller to make sure Ocean can communicate with your cluster. You could use kubectl or Helm. Optionally, you could also install the Prometheus exporter to exclude all Ocean metrics. In addition, you could install the network client to have visibility of your network cost.
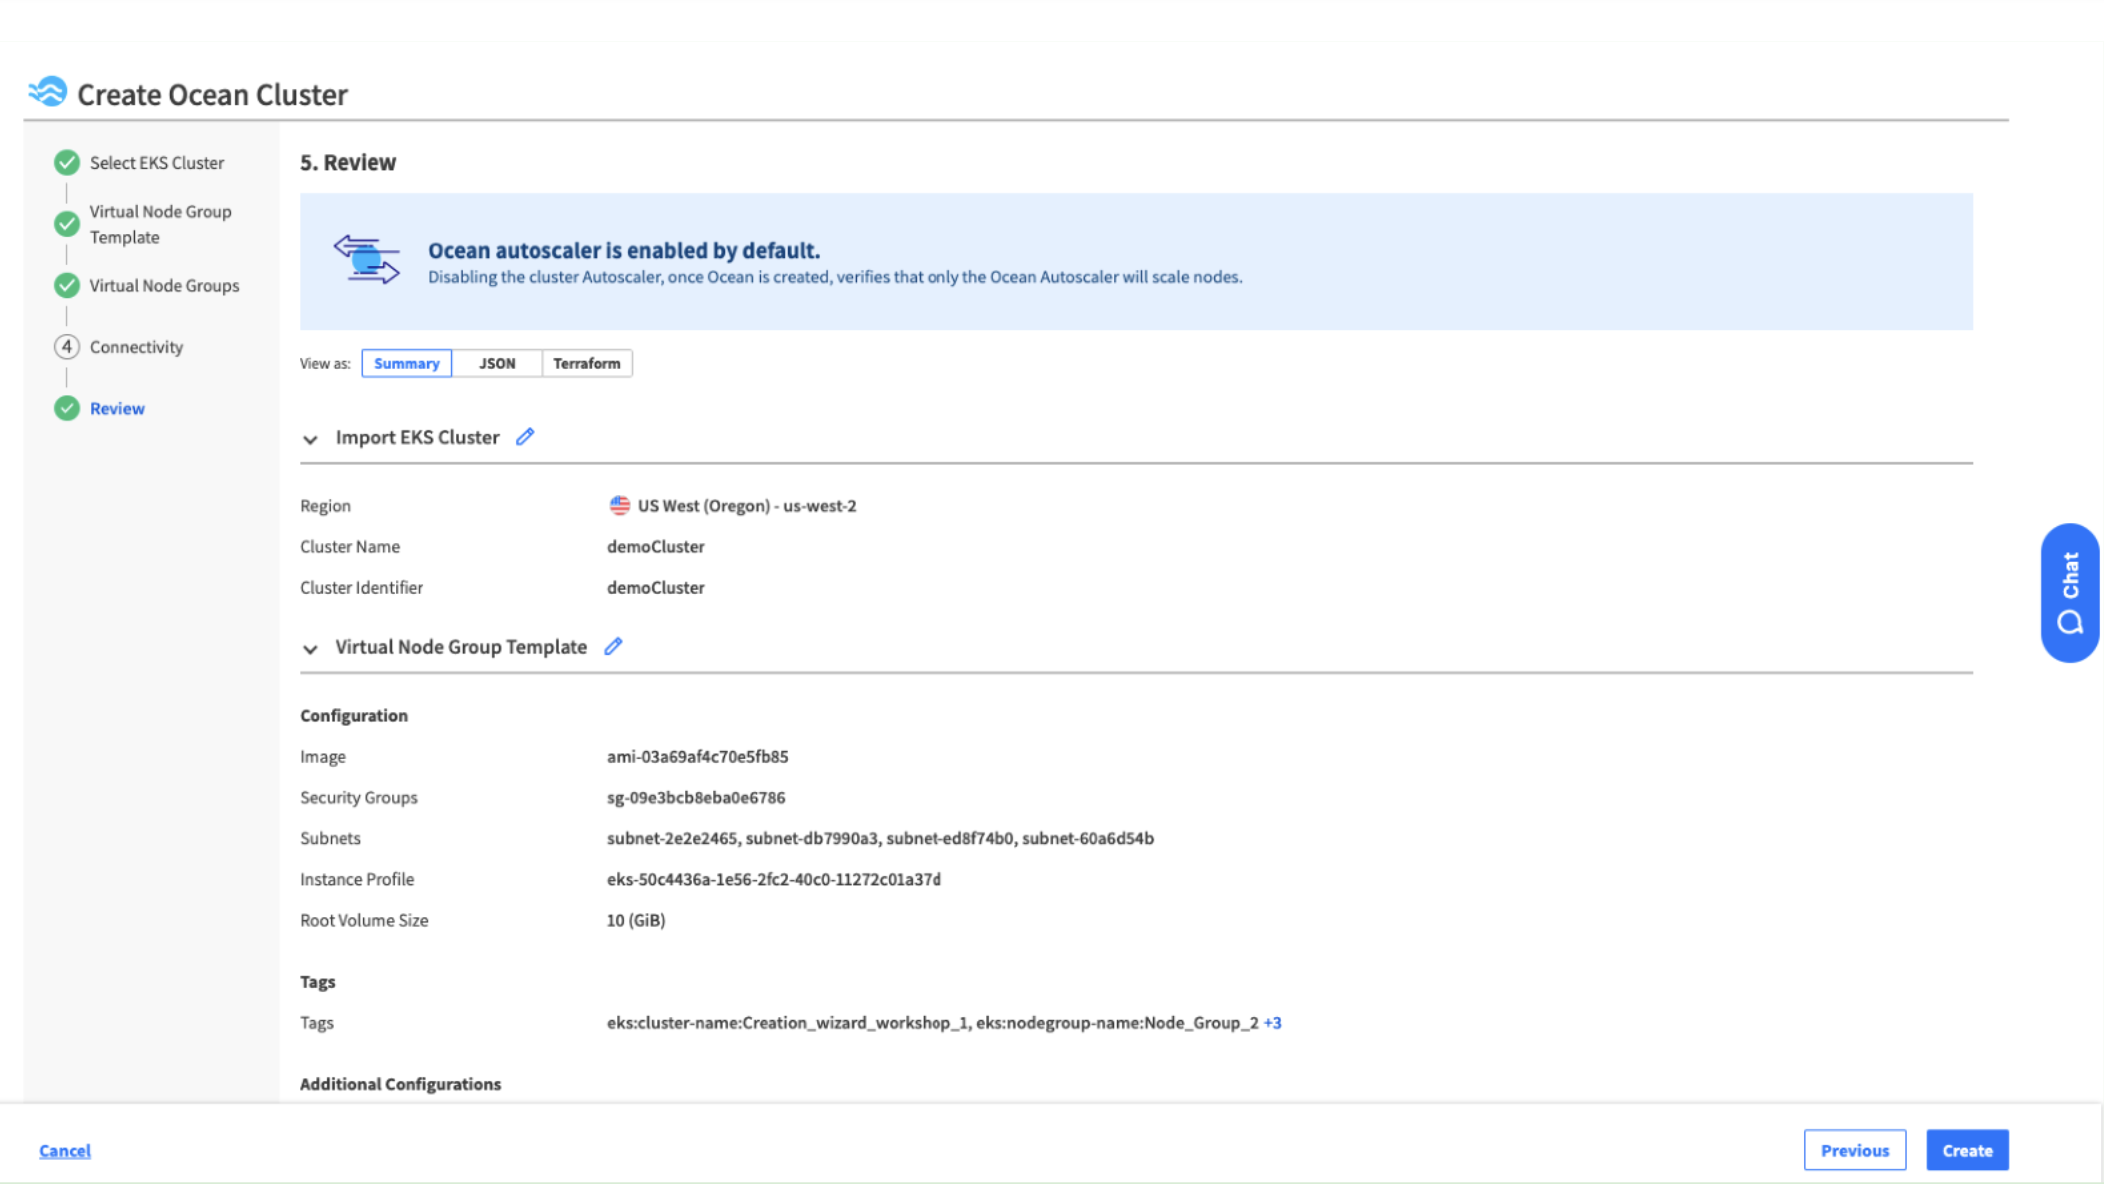
5. Review and create
Review the configuration and, if needed, edit settings by clicking the pencil icons. Once you’ve finished your review, click Create.
Get started creating your EKS clusters with Ocean today. In just five steps, you can have your EKS clusters running and optimized with Ocean. This enables you to begin saving on EKS in the shortest time possible. Don’t just take our word for it – sign up to try it yourself in the Spot console.