 Microsoft Azure
 Cloud Financial Management (FinOps)
 How to Operationalize FinOps
What Is Azure Automanage?
Azure Automanage is a service offered by Microsoft Azure, designed to automate the management of your virtual machines. It can help ensure that VMs are always resource-optimized, secure, and compliant. Azure Automanage is capable of automatically implementing a number of critical management tasks, reducing the need for manual intervention and saving time and resources for cloud teams.
Azure Automanage is not just about automation. It also helps you apply best practices to VM management. The service leverages Microsoft’s extensive experience and knowledge in cloud management, applying proven best practices and configurations to ensure that VMs are always running optimally.
This is part of a series of articles about Azure automation.
In this article:
- Key Features of Azure Automanage
- Azure Automanage Flavors
- Quickstart: Enable Azure Automanage for Virtual Machines
- Best Practices for Azure Automanage
Key Features of Azure Automanage
1. Automated Management
Azure Automanage can automate tasks such as configuring and managing backups, applying OS updates, and enforcing security policies.
Furthermore, Azure Automanage is capable of automating these tasks consistently across all your VMs. This means that you can manage your entire VM environment from a single point, simplifying your management workflow and ensuring consistency across your VMs.
Learn more in our detailed guide to Azure resource manager
2. Alignment of VMs with Azure Best Practices
Another key feature of Azure Automanage is its ability to automatically align your VMs with Azure’s best practices. This includes aspects such as performance, security, reliability, and cost-efficiency. By aligning your VMs with these best practices, Azure Automanage ensures that your VMs are always configured for optimal reliability, performance, and resource usage.
Moreover, Azure Automanage continually monitors your VMs and automatically adjusts their configurations as needed. This means that your VMs are always up to date with the latest best practices.
3. Security and Compliance
Azure Automanage automatically applies Azure’s security configurations to your VMs, ensuring that they are always secure and compliant. This includes aspects such as firewall configurations, intrusion detection, and vulnerability scanning.
Azure Automanage also continually monitors your VMs for security and compliance issues, automatically rectifying any issues it detects. This proactive approach to security and compliance ensures that your VMs are always secure and compliant, reducing the risk of misconfigurations that can lead to breaches and non-compliance issues.
4. Automatic Updates and Patch Management
Keeping your operating systems up to date is a critical aspect of managing your VMs, and Azure Automanage takes care of this for you. The service automatically applies operating system updates to your VMs and ensures they are up to date with the latest security patches and features.
5. Backup and Recovery
Azure Automanage also provides automatic backup and recovery capabilities. The service backs up your VMs, ensuring that your data is always safe and recoverable in case of a disaster. It integrates with Azure Site Recovery, enabling enterprise-grade disaster recovery strategies.
Azure Automanage Flavors
There are two primary flavors of the Azure Automanage service: for Linux and Windows VMs.
Automanage for Linux
Automanage for Linux is designed specifically for Azure VMs running on Linux. It provides automated management capabilities that align with Linux best practices, making it an ideal choice for businesses with Linux-based systems.
Automanage for Linux automates tasks such as patching, backup, and monitoring, ensuring that your Linux VMs are always in optimal condition. Automated patching means that your VMs will always be up to date with the latest security updates. Automated backup ensures that your data is always safe, and automated monitoring allows for quick identification and resolution of any issues that may arise.
Automanage for Linux also offers additional features such as automatic configuration of Azure Disk Encryption and Azure Security Center.
Azure Automanage for Windows Server
Azure Automanage for Windows Server is a version of Azure Automanage tailored for Windows Server users. It provides the same automated management capabilities as Automanage for Linux, but with additional features that align with Windows Server best practices.
Azure Automanage for Windows Server not only automates tasks such as patching, backup, and monitoring but also offers automatic configuration of Windows-specific features. For instance, it automatically configures Windows Server Backup, Windows Update, and Windows Defender. This ensures that your Windows Server VMs are not only managed but also optimized according to Windows Server best practices.
Azure Automanage for Windows Server also provides automated management of Azure-specific features such as Azure Backup, Azure Security Center, and Azure Log Analytics.
Quickstart: Enable Azure Automanage for Virtual Machines
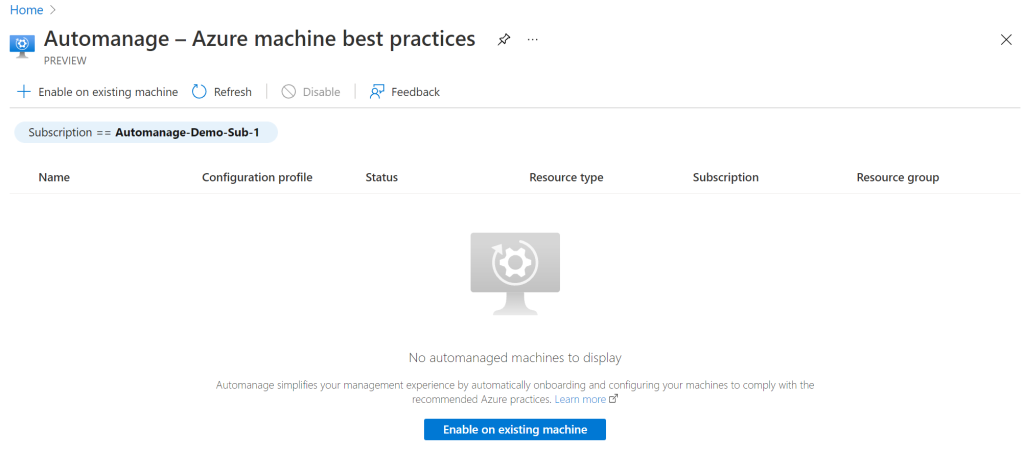
Enable Automanage on Existing Machines
Azure Automanage can be enabled on existing virtual machines without causing any disruption to your ongoing operations.
Firstly, log in to the Azure portal. From there, navigate to the virtual machines section. Select the VM you wish to enable Automanage on. In the operations section on the left-hand pane, you’ll find the option to enable Automanage. Clicking on it will open a new pane where you can specify the configuration settings for Automanage.
It’s important to note that Automanage requires certain permissions to operate. Therefore, you need to make sure that the account you’re using to enable Automanage has the necessary permissions. If you’re unsure, check the Microsoft documentation for the required permissions.
Once you’ve set up the configuration and ensured the necessary permissions, click on the Enable button. Azure will then start the process of enabling Automanage. This process may take a few minutes, so be patient.
Disable Automanage for VMs
There may be times when you want to disable Automanage. This might be due to budget constraints, a change in your IT strategy, or any other reason.

Just like enabling Automanage, you start by logging into the Azure portal and navigating to the virtual machines section. Select the VM you wish to disable Automanage on. In the operations section on the left-hand pane, you’ll find the option to Disable automanagement. Clicking on it will bring up a confirmation dialogue box.
Before you proceed with disabling Automanage, it’s important to understand the implications. Disabling Automanage will stop all automated management tasks. This means that you will have to manually manage the VMs.
If you’re sure about your decision, click on the disable button. Azure will then begin the process of disabling Automanage. This process can take a few minutes.
Best Practices for Azure Automanage
Periodically Reviewing and Adjusting Automanage Configurations
Regularly reviewing and adjusting Azure Automanage configurations is crucial for maintaining optimal performance and security. It’s recommended to periodically evaluate the configurations against the current requirements and workloads of your VMs. This ensures that the automation aligns with the evolving needs of your organization. Additionally, regular reviews can help identify and rectify any discrepancies that may arise over time, such as changes in security policies or performance optimization needs.
To conduct these reviews effectively, utilize Azure’s built-in analytics and reporting tools. These tools can provide insights into the performance and security status of your VMs, allowing you to make informed decisions about configuration adjustments. Ensure that any changes made are thoroughly tested before being applied to production environments to avoid potential disruptions.
Ensuring Compatibility with Existing VM Setups and Tools
When implementing Azure Automanage, it’s critical to ensure compatibility with your existing VM setups and tools. This includes verifying that the automation processes of Azure Automanage do not conflict with any custom configurations or third-party tools currently in use. For instance, if you have specific backup or monitoring tools already in place, ensure that Azure Automanage’s settings do not override or interfere with these tools.
Conduct a thorough assessment of your current VM environments and tools to identify any potential compatibility issues. If necessary, adjust the Automanage settings or the existing setup to ensure seamless integration. This might involve customizing Automanage policies or updating the existing tools to be compatible with Azure’s automation features.
Monitoring and Logging Automanage Actions and Changes
Effective monitoring and logging of Automanage actions and changes are essential for maintaining oversight and ensuring accountability. Azure Automanage performs numerous automated tasks, and it’s important to have a clear record of these actions for troubleshooting, auditing, and compliance purposes.
Utilize Azure’s monitoring and logging capabilities to track all Automanage activities. Ensure that logs are comprehensive and include detailed information about each action taken by Automanage, such as changes in configurations, updates applied, and any detected security issues. Regularly review these logs to stay informed about the state of your VMs and to quickly identify and address any issues that may arise.
Integrate with Existing Management Solutions
Integrating Azure Automanage with existing management solutions can enhance your overall cloud management strategy. If you are using other Azure services or third-party management tools, consider how Automanage can complement these solutions. For example, integrating Automanage with Azure Security Center can provide a more robust security posture, while combining it with Azure Monitor can offer deeper insights into VM performance.
To achieve effective integration, assess your current management tools and identify areas where Automanage can add value. Ensure that the integration is seamless, with data and alerts from Automanage easily accessible within your existing tools. This approach can help streamline management processes, reduce operational overhead, and provide a more unified view of your cloud environment.
Related content: Read our guide to Azure automation tools
Azure Automanage with Spot
With Spot’s suite of solutions, you can continuously optimize and automate your Azure infrastructure to deliver your cloud applications at scale.
Learn more about Spot’s solutions for Microsoft Azure