 Microsoft Azure
 Cloud Financial Management (FinOps)
 How to Operationalize FinOps
Ocean for Apache Spark has featured support for integration with Jupyter notebooks for quite some time – for details, please see our documentation. However, many developers would like to have this interactive notebook within their familiar IDE, such as VS Code, so that they can benefit from other IDE built-in features including Git integration. This article describes how to use VS Code to run Jupyter notebooks, while the code executes on an Ocean for Apache Spark cluster.
This setup provides the following advantages:
- As Ocean for Apache Spark runs on Kubernetes, there is no need to provision a cluster for development purposes.
- Since the cluster automatically scales up and down, there is no need for Data Engineers or Data Scientists to guess what size of cluster they need to provision for their development purposes.
- Each developer can run their code independently without worrying about compute resources – no developer can starve out others.
- Each developer can develop and test different versions of Spark, and of their own dependencies and third-party libraries, without affecting the rest of the cluster.
- As the autoscaling happens in almost real-time, there is no need to set a time to remove the compute resources.
- Enables effective utilization of spot instances from multiple instance families which reduces cloud provider infrastructure cost.
In short, Ocean for Apache Spark completely eliminates the burden of infrastructure management, and provides a continuously optimized and autoscaled infrastructure so that developers can focus on solving business problems.
Setup a VS Code environment
Please follow these steps:
- Clone or download the Ocean Spark Examples repo at: https://github.com/spotinst/ocean-spark-examples
- Download latest version of VS Code.
- Install the Jupyter plug-in from Microsoft.

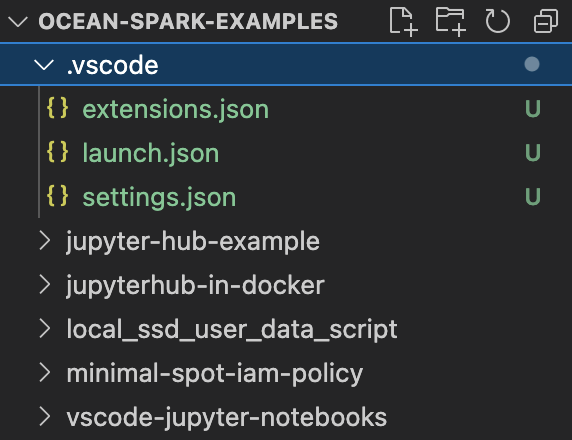
- Copy the
.vscodefolder and.gitignorefile into the root folder of your code that you will check-in to your Git repository from the folder cloned/downloaded in step 1.
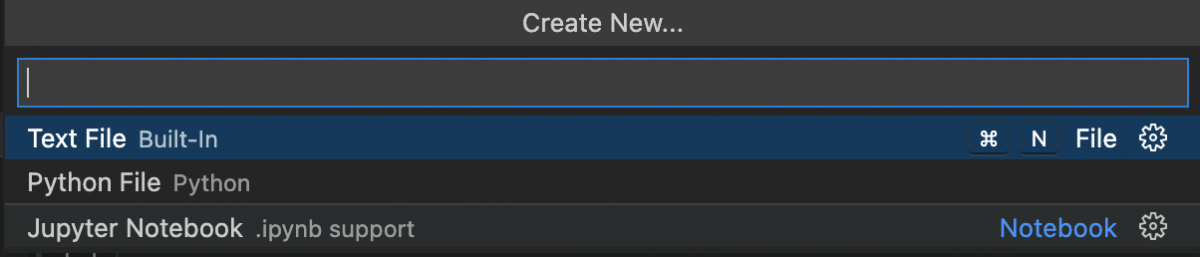
- Create or Choose the folder when you want to create your notebooks. Please click on File Menu, click on File -> New File… and choose Jupyter Notebook.

- A Jupyter notebook opened in the VS Code editor. Please save it, for example
VSCodeNotebookExample.ipynbdescribed in this example. - Click on File -> New File… and choose Text File. Save it as Dockerfile and add the following contents into the Dockerfile.
FROM gcr.io/datamechanics/spark: platform-3.2-latest USER root RUN apt-get update && apt-get install -y python3 python3-pip libffi-dev ENV PYSPARK_MAJOR_PYTHON_VERSION=3 WORKDIR /opt/application/ COPY ./VSCodeNotebookExample.ipynb . RUN pip3 install jupyter RUN jupyter nbconvert --to script VSCodeNotebookExample.ipynb - The above Dockerfile converts the ipynb file to a python file during the Docker image build process. If you want to use any 3rd party libraries, include them in the
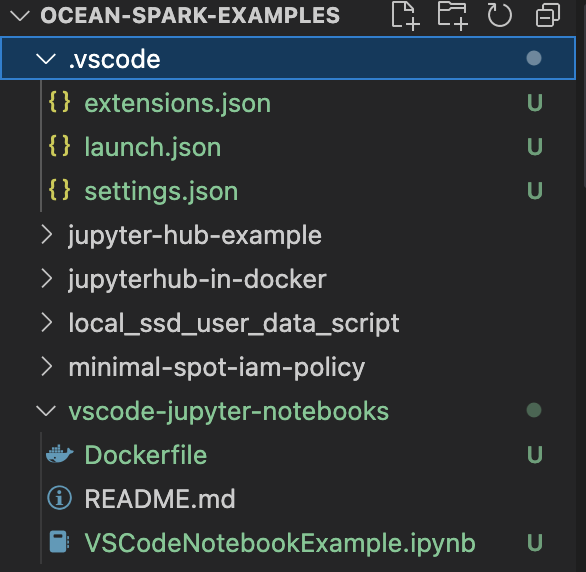
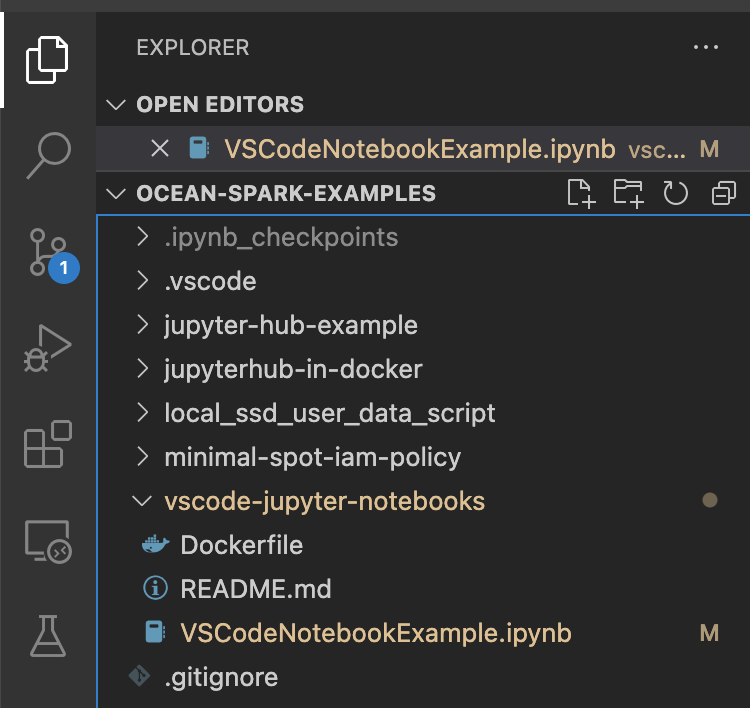
requirements.txtfile and run it in the above script. - The folder structure should look similar to this:

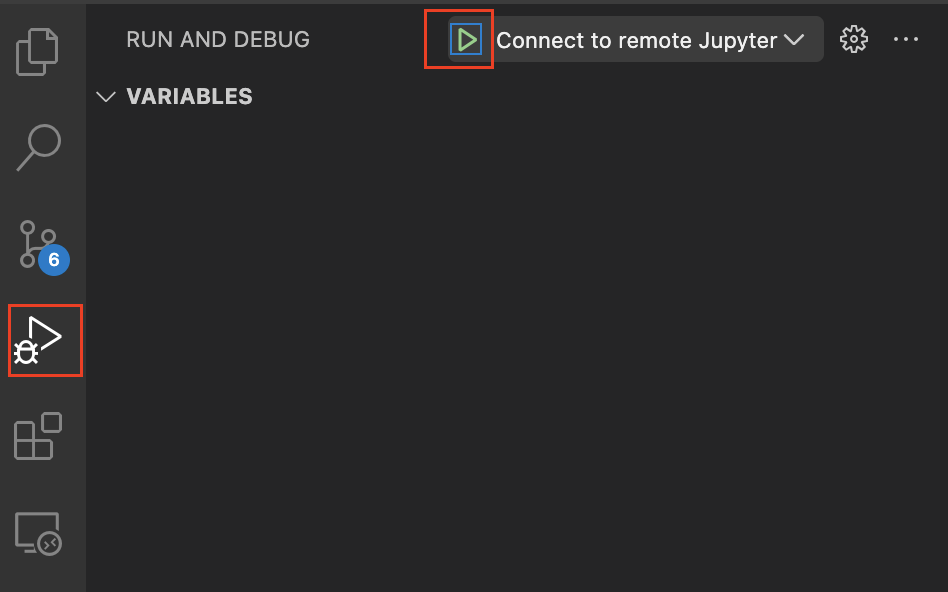
- Click on Run and Debug icon. If you see “Run and Debug” button, click on it.

- Select “Connect to remote Jupyter” if it is not already selected and click on play (triangle) button.
- Enter your Ocean for Apache Spark cluster id when prompted and hit enter.

- Enter your Spot personal access token when prompted and hit enter.

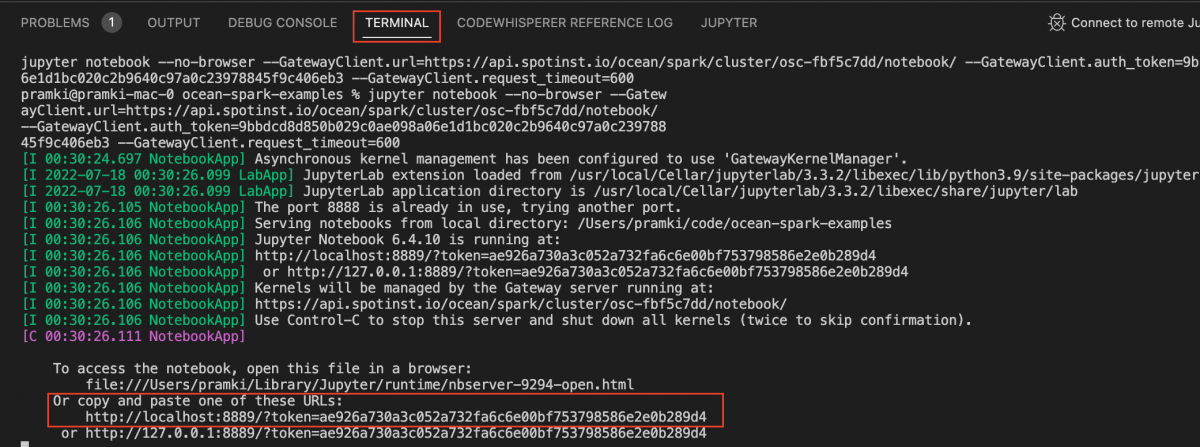
- You should see the notebook app starting in the terminal. Copy the URL in the output like:

- Click on Explorer and open the code file, for example
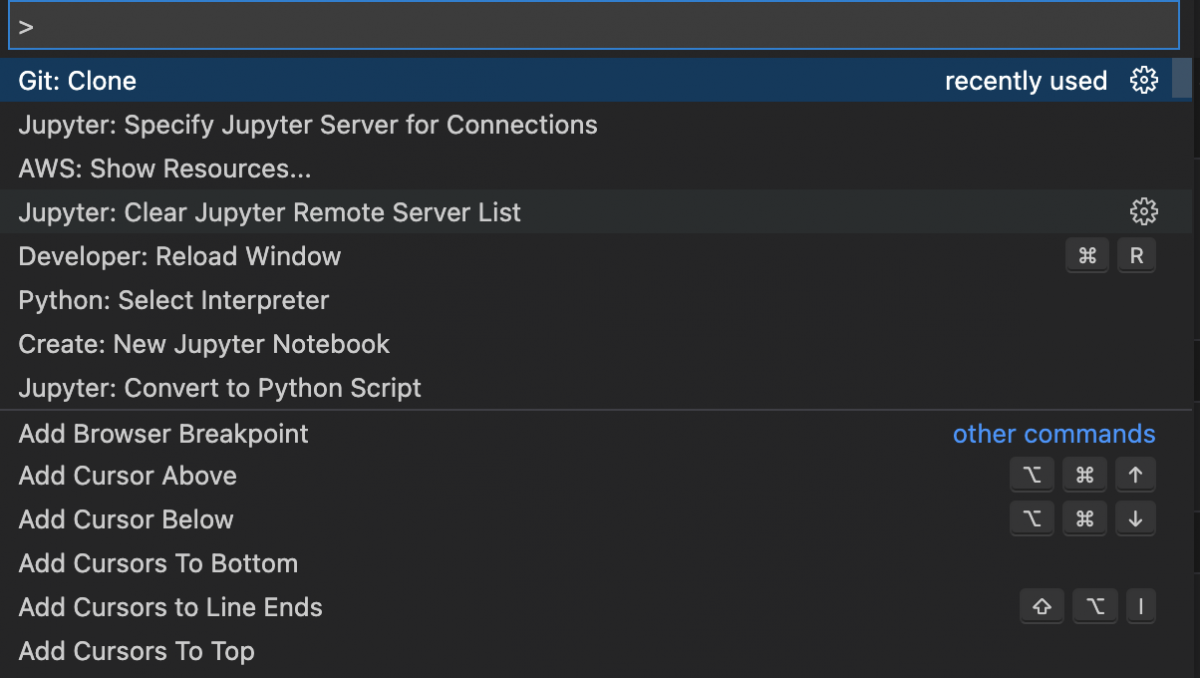
VSCodeNotebookExample.ipynb. - Click on View -> Command Palette… and select “Jupyter: Specify Jupyter Server for Connections.”

- Click on Existing and copy the URL copied in Step 14 and click on Enter.
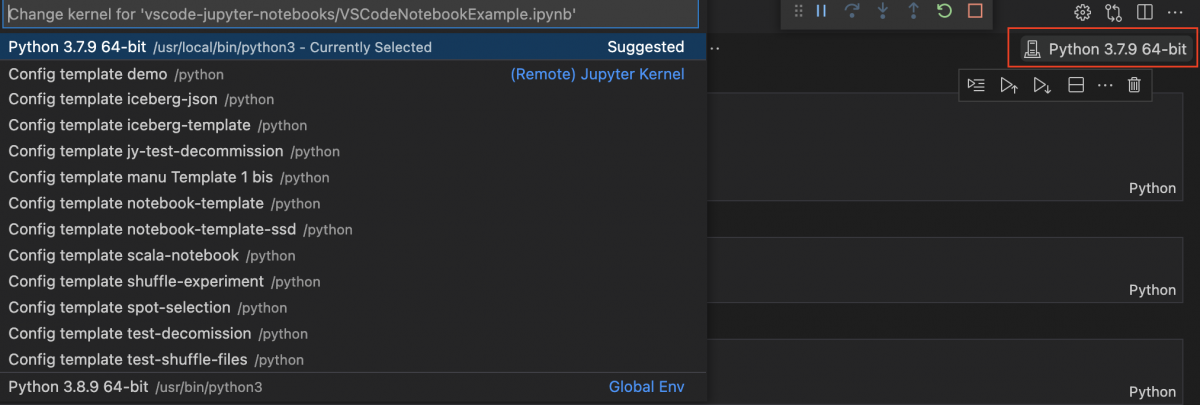
- Click on kernel selector on the right side.

- It should show the templates available in Ocean for Apache Spark. Select the template that you want to use to run the notebook.
- You may run the commands in the notebook. As you run the command, you may see that the Notebook app started in the Spot Console UI.


End-to-end example using Github actions and Airflow
The following example shows how to use Github actions, Github container registry and Airflow to run a notebook application end-to-end. Please note you can use your favorite Git repository, CI/CD tool, container registry and workflow tools.
Make a change and check-in the code from VS Code
Whenever you make code changes in VS Code editor and save the file, it shows the pending changes at the source control icon.
Click on Source Control icon, enter a commit message and click on Commit.
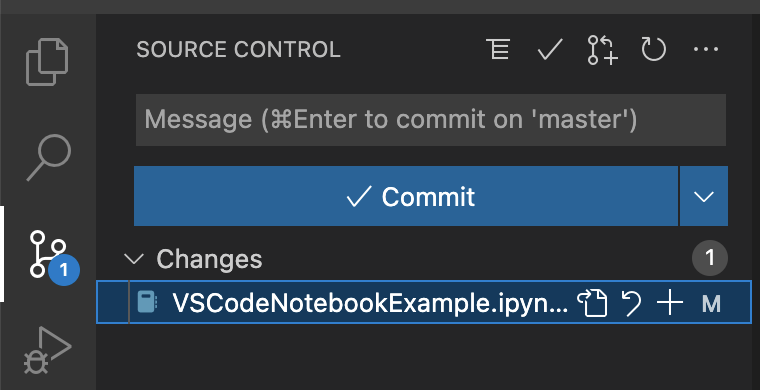
And click on Sync Changes to commit the changes to the remote repository.
Build and Push Docker images into Container Registry
In Github, create two Github secrets
- GHCR_PASSWORD – Use this secret to publish the docker images to the Github Docker container registry. The personal access token associated with this secret has read, write and delete packages permissions.
- GHCR_PULL_PASSWORD – Use this secret in APIs, airflow to pull images from the container registry. The personal access token associated with this secret has read packages permissions.
In the Github repository, create a new workflow from the Actions menu of the repository (Actions -> New workflow). In the Choose a workflow screen, it shows Docker Image in the suggested for this repository section. Click on “Configure.” Give it a name such as vscode-jupyter-notebooks-cicd.yml, use the following as a template. Click on “Start Commit” and commit directly to the main branch.
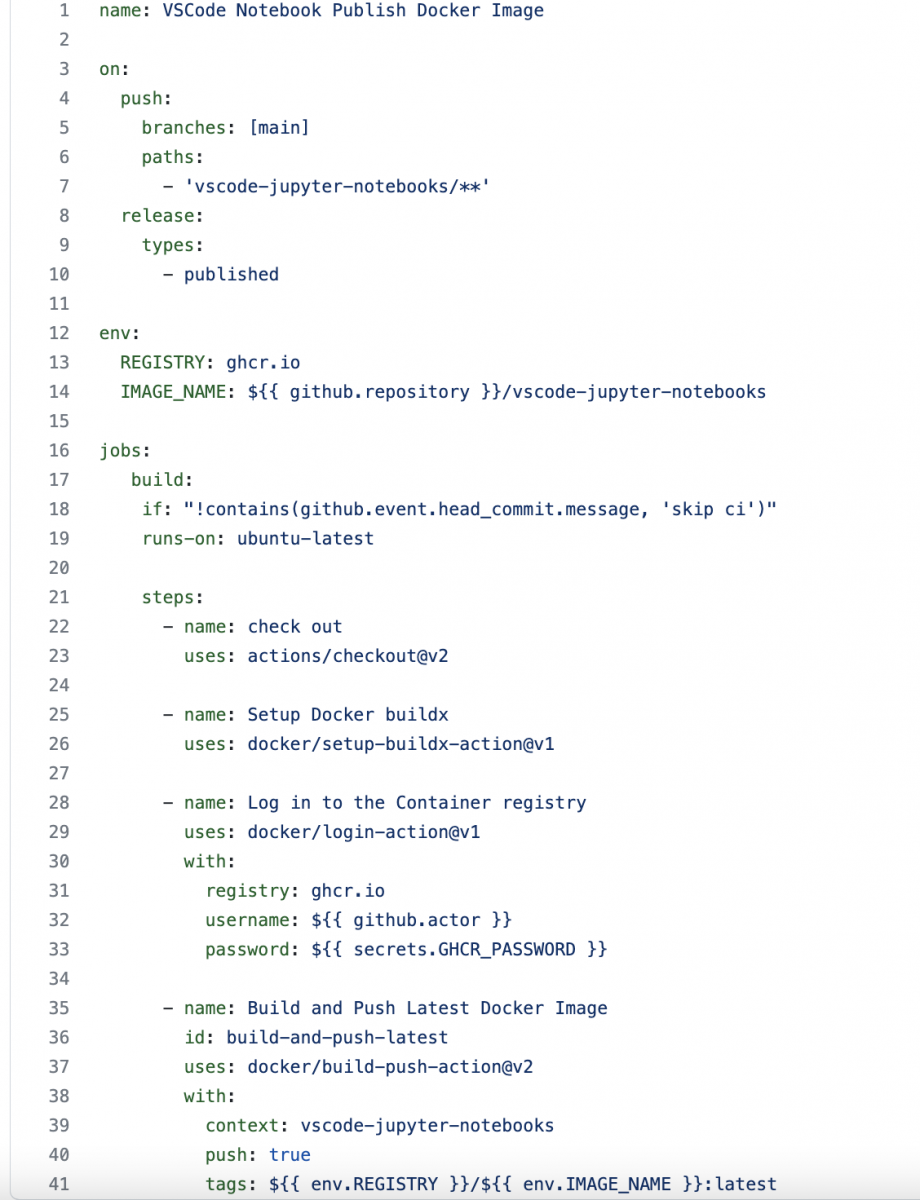
Whenever a code check-in happens in the “vscode-jupyter-notebooks” folder in the repository main branch, an image gets built and stored in the Github container registry.
Create Kubernetes secret and use it in Airflow
Create a Kubernetes secret that connects to the Github Docker container registry to pull the images. Make sure you create the secret in the spark-apps namespace.
The following instructions provide steps to create the secret from command line using kubectl:
- Set the context to the “spark-apps” namespace.
kubectl config set-context --current --namespace=spark-apps
- Create the secret.
kubectl create secret docker-registry {give a name such as github-pull-image-secret}
  --docker-server="https://ghcr.io/"
  --docker-username={Github username}
  --docker-password={personal access token that has got packages read permission}
--docker-email={email of the Github user}- Use the Kubernetes secret created above in the config overrides section of Airflow DAG.
config_overrides = {
  "type": "Python",
  "sparkVersion": "3.2.0",
  "imagePullSecrets": ["github-pull-image-secret"],
  "image": "ghcr.io/{path to image}",
   ...
   }
Conclusion – Final Thoughts
The ability to use VS Code as the development environment and Ocean for Apache Spark as the compute layer provides the best developer experience and inexpensive compute to develop data engineering applications.
The above example shows Github actions and Github container registry but you may use any of your favorite CI/CD tools and container registries to build and host the Docker images.
Start using Ocean for Apache Spark
VS Code is just one of several built-in integrations that Ocean for Apache Spark supports to help data teams run their Spark applications with Kubernetes. Learn how you can easily set up, configure and scale Spark applications and Kubernetes clusters with Ocean for Apache Spark. You are invited to schedule an initial meeting with our team of Apache Spark Solutions Architects, so we can discuss your use case and help you with a successful onboarding of our platform.