For AWS customers, CodePipeline is a popular choice for automating the CI/CD process and one that we see growing in use with spot instances. The pipeline coordinates actions that orchestrate a full application release which is trackable and reversible. Now it is possible to use Elastigroup by Spot as one of these actions for efficient scaling and management of new deployments.
Where CI/CD and cloud cost optimization meet
For those of you that are new here, Elastigroup enables you to reliably run your workloads on Amazon’s EC2 spot instances, Azure spot instances and GCP’s preemptible VMs. This helps you achieve up to 90% cost savings on your compute spend, which is often the majority of one’s cloud bill.
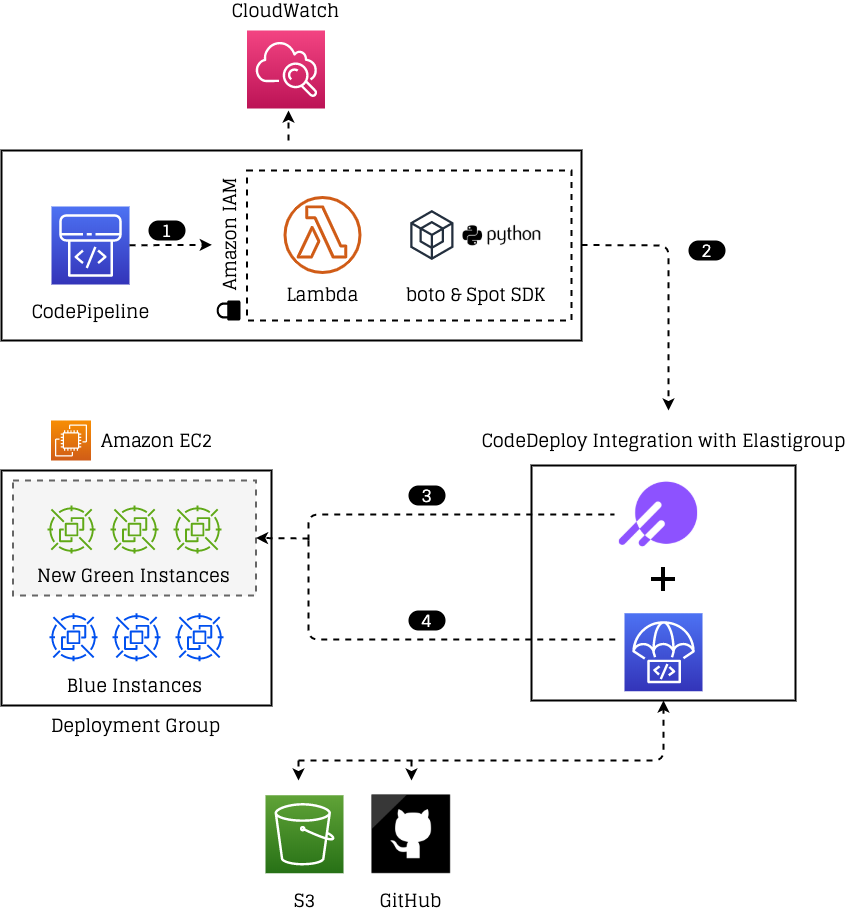
Our existing integration with AWS CodeDeploy enables you to perform Blue/Green deployments on spot instances, with CodePipeline automating the entire process using a single API Call.
To avoid confusion between different instances being launched for different applications and environments, we generate a unique tag or UUID, that’s assigned to the newly launched “Green” instances. We can then automatically locate those new instances to deploy our application (see step 11 in the CodeDeploy UserGuide on how this is done), and once successfully deployed, have the greens replace the blues.
All of this is neatly wrapped and managed in a CI/CD fashion, with an AWS Lambda function acting as a stage within the AWS CodePipeline.
Getting started
Before defining your CodePipeline workflow, you will need to first set up your CodeDeploy and Elastigroup integration as well as your Lambda function.
CodeDeploy integration with Elastigroup
Once your CodeDeploy application is set and ready, we want to make sure CodeDeploy is integrated with Elastigroup.
This will enable you to launch and manage new spot instances upon which you can run your application(s).
Here are step-by-step instructions for the integration.
AWS Lambda for application deployment automation
We will use an AWS Lambda function (which we developed for this purpose – GitHub repository) to automate and orchestrate the whole process of the application deployment, using CodeDeploy and Elastigroup’s respective APIs.
As our function integrates with Spot.io and AWS services we will need to grant it the necessary IAM permissions.
To create the Lambda function, follow these steps:
Create the relevant IAM Role our Lambda function will use
- Open up AWS IAM service.
- Create a new policy, and switch to “JSON” tab.
- Copy and Paste the Policy Definition JSON content from the LambdaPolicyDefinition.json in the GitHub Repo.
Review and name the Policy. - Attach the newly created Policy to a Role.
Create the Lambda function
- Open up AWS Lambda service.
- Create a new Lambda function.
- Name the function and choose a runtime of Python 3.7 or newer.
- Attach the previously created IAM role to the Permissions section.
- Create the function.
- Open the above mentioned GitHub repository, and download the “lambda_package.zip” file.
- In the “Function Code” section, under “Code entry type”, choose “Upload a .zip file”.
Provide “lambda_package.zip” file from Step 10. - Change the Handler clause to “bluegreen.lambda_handler”.
- Save the changes.
Now we have our AWS Lambda function ready to be deployed in CodePipeline.
Starting the process with AWS CodePipeline
AWS CodePipeline will trigger the Blue/Green Deployment when needed.
We add a dedicated step for our Lambda function that feeds the right parameters from CodePipeline using UserParameters.
For additional information see: Invoke an AWS Lambda Function in a Pipeline in CodePipeline – CodePipeline
In order to use our Lambda function as a stage we can use our existing Pipeline or create a new one.
Then we will add a stage, and a new action group to encapsulate our Lambda function action.
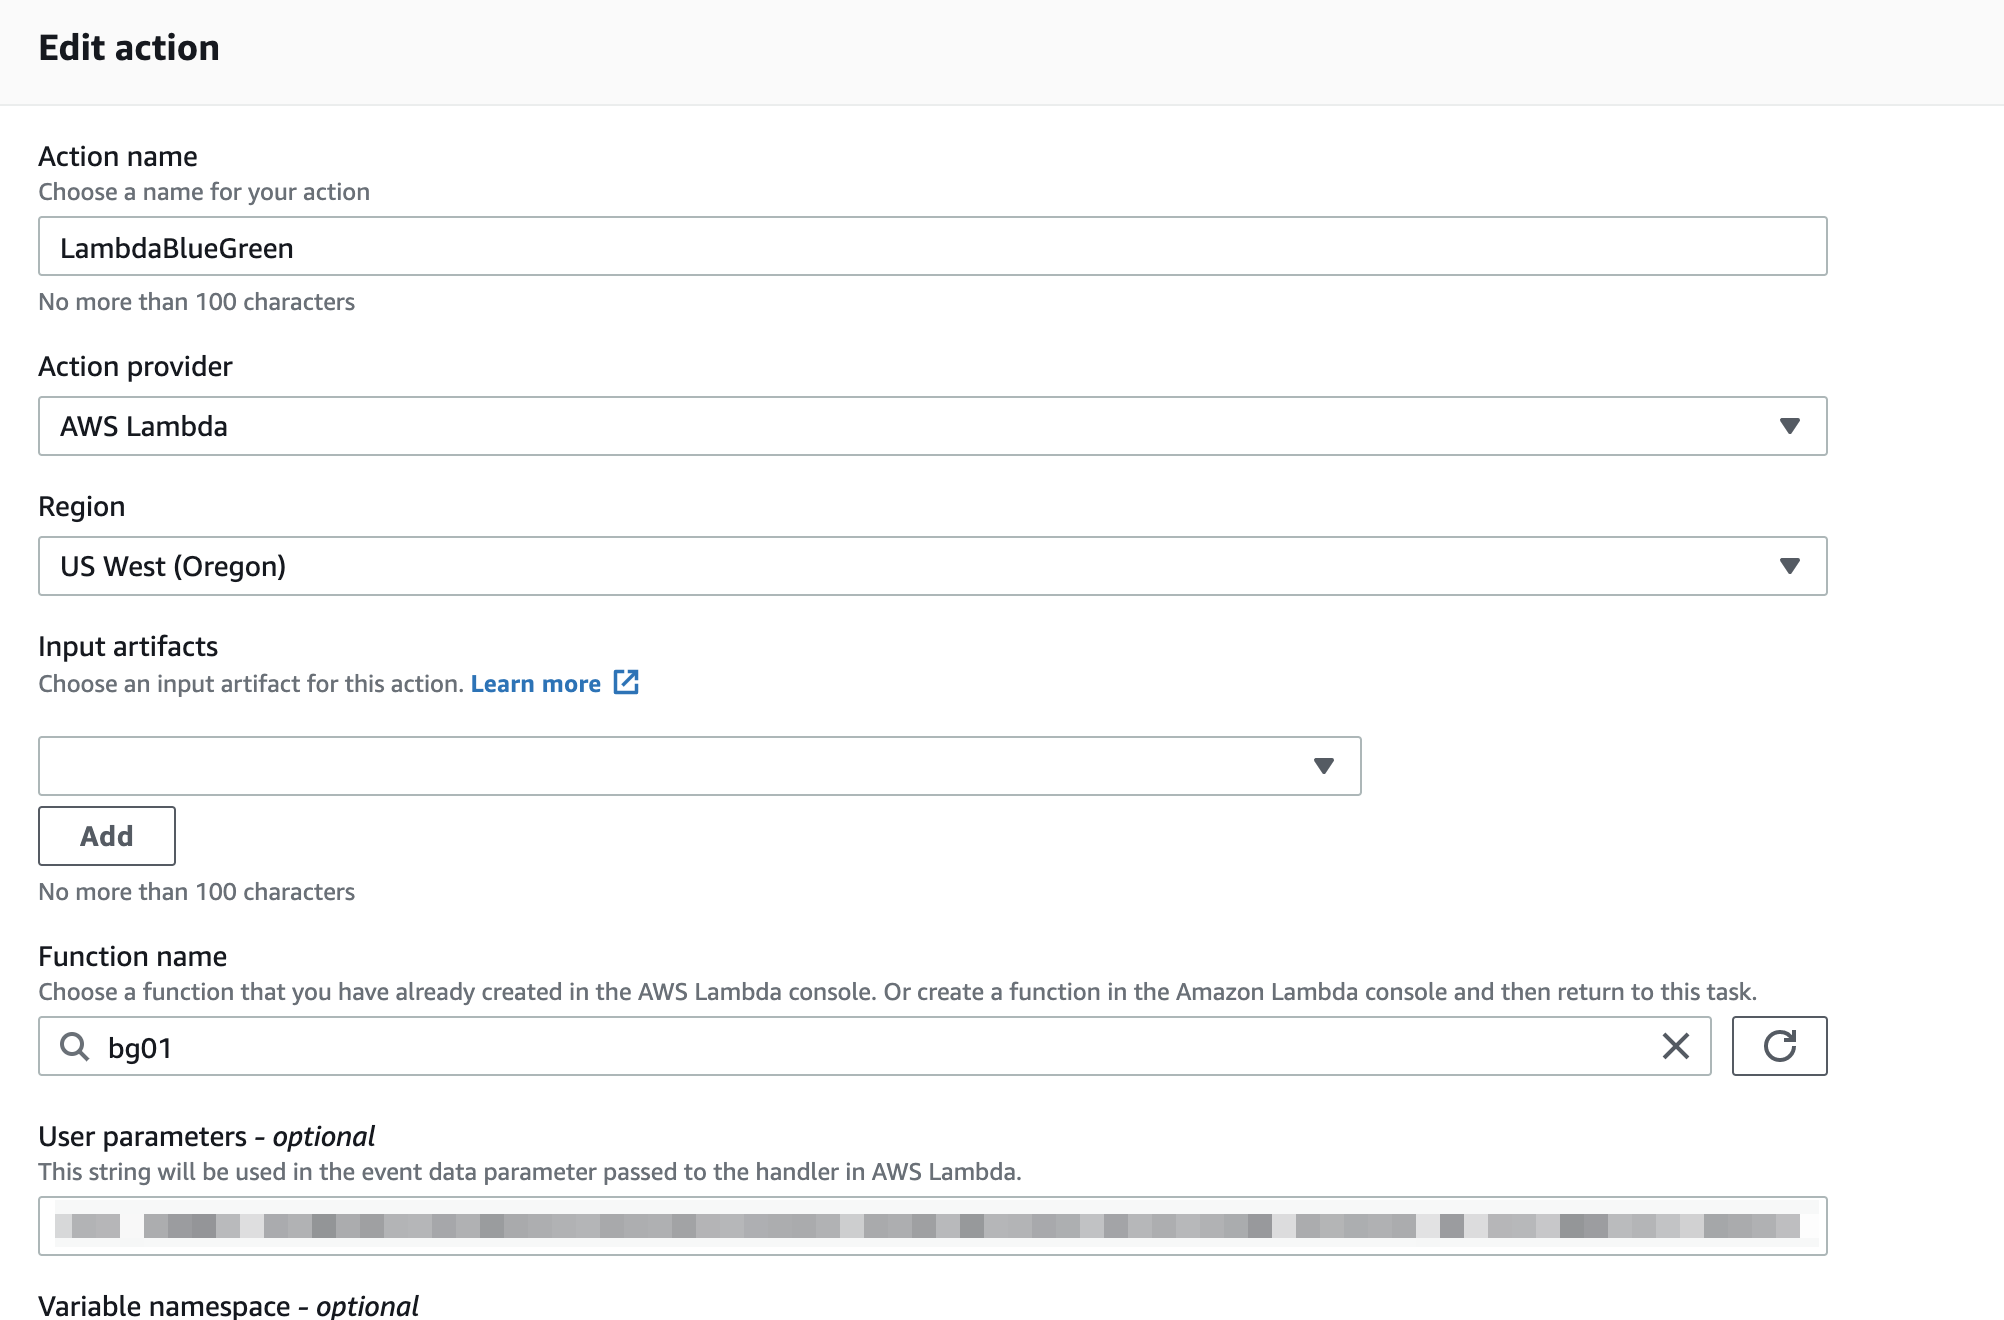
While creating our AWS Lambda action, make sure to choose the previously created Lambda function, and provide the parameters to our function using the “UserParamteres” clause.
Below is a screenshot of the Lambda function as it is configured within CodePipeline as an action.
UserParameters should be provided in the form of a JSON string like the example below.
{
 "API_TOKEN":"123ABCDE4567FGHI890”,
 "ACCOUNT_ID":"act-1234abcd",
 "GROUP_ID":"sig-1234abcd",
 "APP_NAME":"CodeDeploy-Application",
 "DEPLOYMENT_GROUP":"CodeDeploy-DeploymentGroup",
 "TIMEOUT":600,
 "S3_BUCKET":"aws-codedeploy-bucket",
 "S3_KEY":"samples/latest/SampleApp_Linux.zip",
 "S3_BUNDLE":"zip"
}
For detailed explanation of each parameter and its use, consult the table below:
| UserParameter | Description |
| API_TOKEN | Authentication token for Spot API |
| ACCOUNT_ID | Spot Account ID |
| GROUP_ID | Spot Elastigroup ID |
| APP_NAME | Name of the application in CodeDeploy |
| DEPLOYMENT_GROUP | Name of the Deployment Group in CodeDeploy |
| TIMEOUT | Timeout in seconds for the deployment process |
| S3_BUCKET* | Name of the S3 Bucket of our CodeDeploy Application Revision |
| S3_KEY* | Key of the S3 file of our CodeDeploy Application Revision |
| S3_BUNDLE* | File format: tar | tgz | zip | YAML | JSON |
| GITHUB_REPO* | Name of the GitHub Repository of our CodeDeploy Application Revision |
| COMMIT_ID* | ID of the commit in GitHub of our CodeDeploy Application Revision |
⚠️ For your application revision to deploy, you should provide its source from either S3 or GitHub.
How it all looks in action
Once all the prerequisites of integrating CodeDeploy with Elastigroup and creating the Lambda function are complete, this is what the complete process looks like:
Step 1
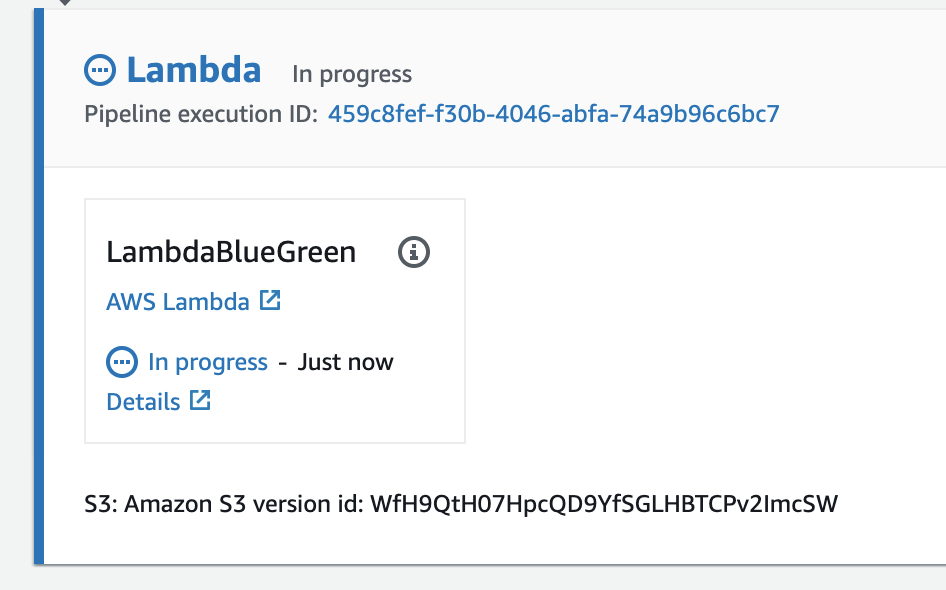
CodePipeline launches your Lambda function with the appropriate parameters to start the Blue/Green Deployment.
We should now see this:
Step 2
Once our Lambda function has launched from CodePipeline, it means that your deployment process has been initiated. You will have a CloudWatch log stream that allows you to follow the process of the Lambda function.
Below is an example of a fully completed log:
Step 3
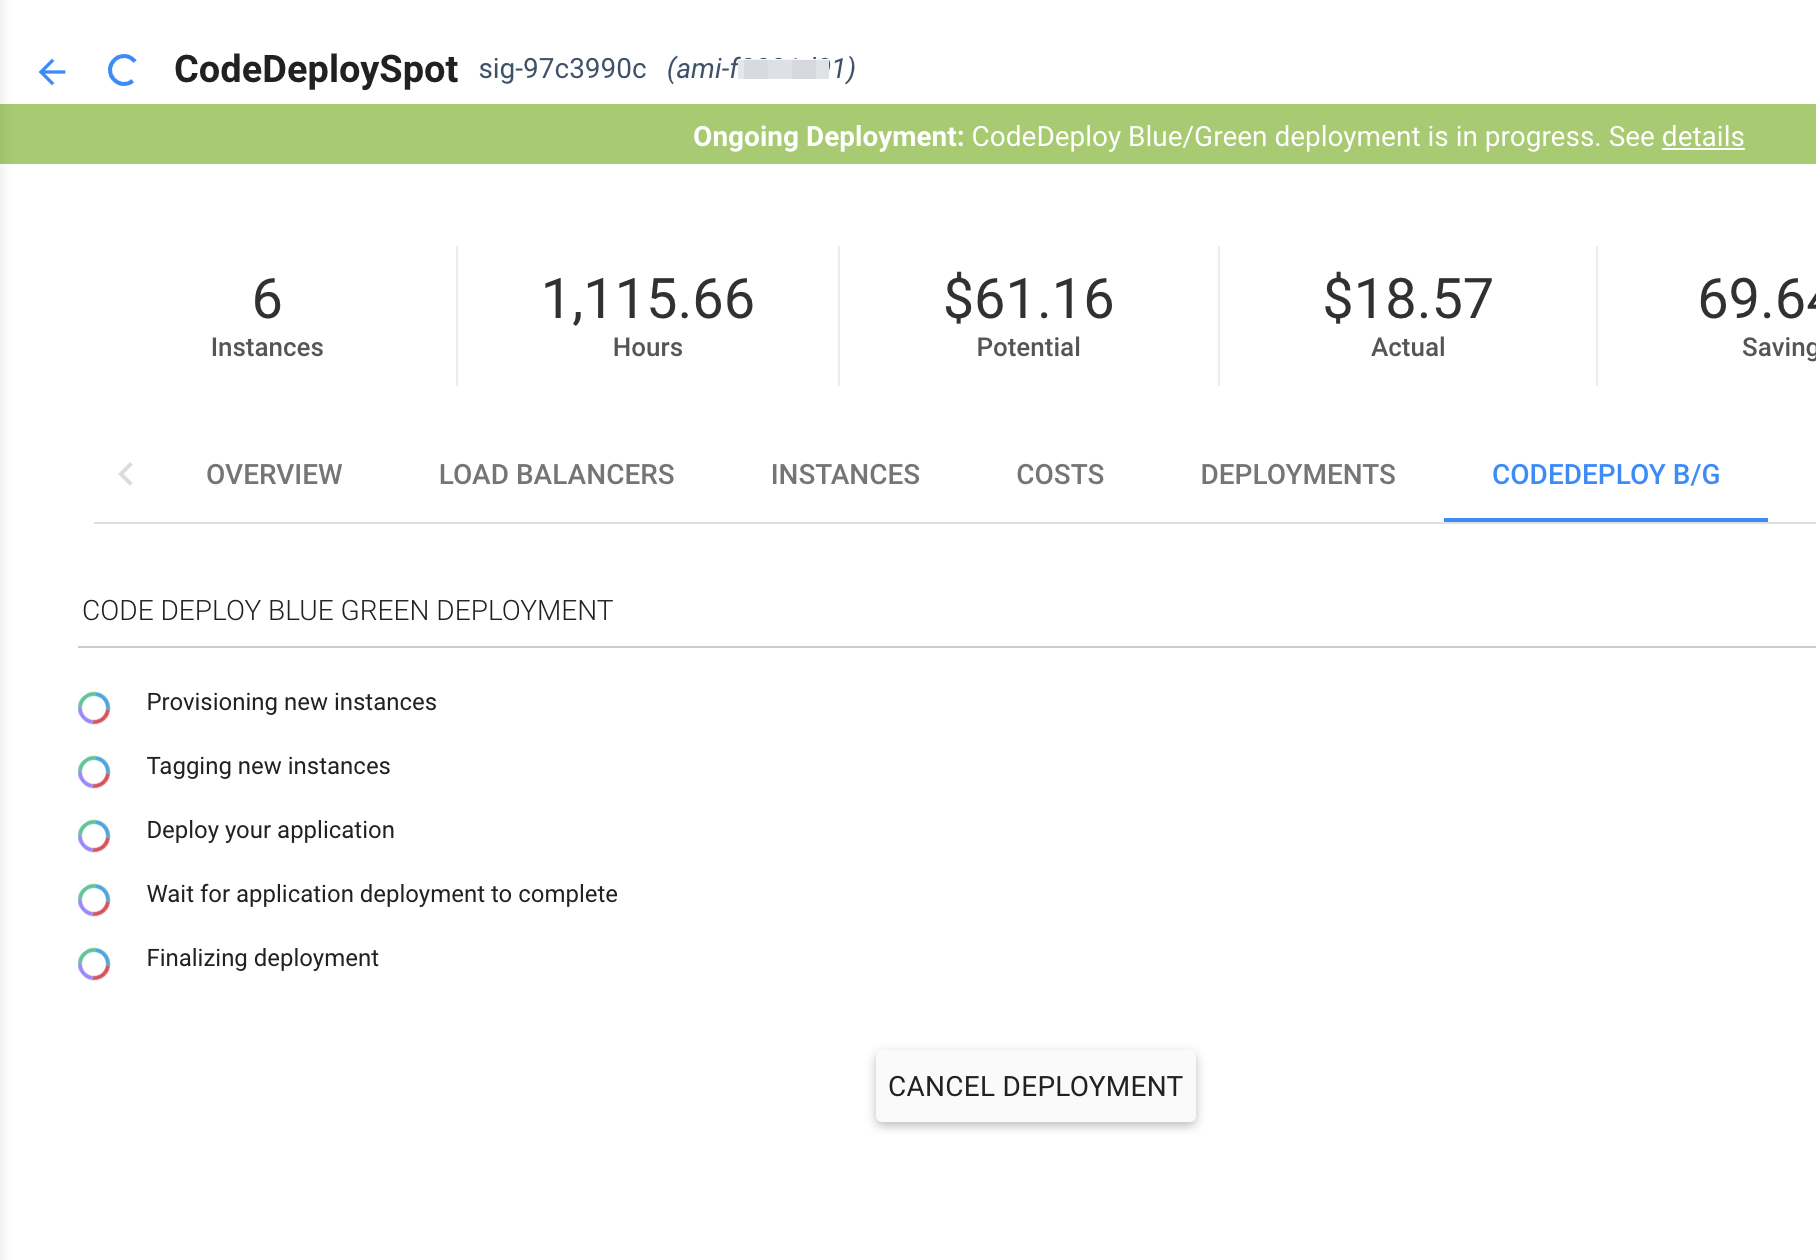
Elastigroup will recognize that a new deployment has been created, and you can follow the process from the “CodeDeploy B/G” tab of your Elastigroup group.
Elastigroup will then make sure you have newly launched EC2 spot instances. These Instances will act as your Green Instances.
Part of the automation will set them up with unique tags which you can see below by the tag key “GreenIdentifier” and their unique tag value.
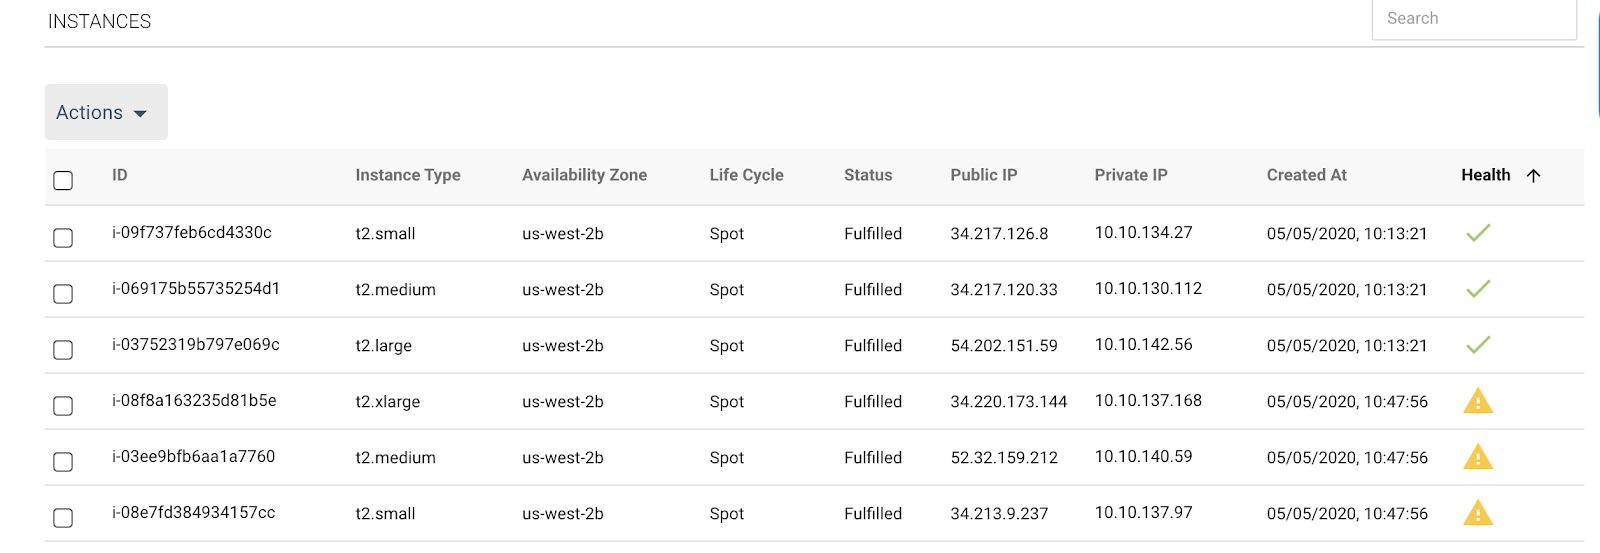
We can also follow the process from the Elastigroup “Instances” tab.
Step 4
The moment your new instances have finished the launch process and are in a ready state, CodeDeploy will attempt to deploy the new Application Revision from either an AWS S3 Bucket or a GitHub Repository, based on the source provided in the UserParameters of the AWS Lambda Function, to the newly launched Green instances, and ultimately complete the Blue/Green Deployment.
CI/CD, Blue/Green deployment and extreme cost optimization all in one place
CloudOps can be defined as best practices, processes and tools for CI/CD, cost management, and security in the cloud.
Being able to provide our customer with the means to fully automate their Blue/Green deployment, wrap it in a CI/CD process, while reliably leveraging spot instances for dramatic savings, reflects our focus on CloudOps excellence, something which we hope you will benefit from as well.
See you again soon for more posts on similar “real world” use cases of cloud and DevOps related technologies!


