Microsoft Azure
 Cloud Financial Management (FinOps)
 How to Operationalize FinOps
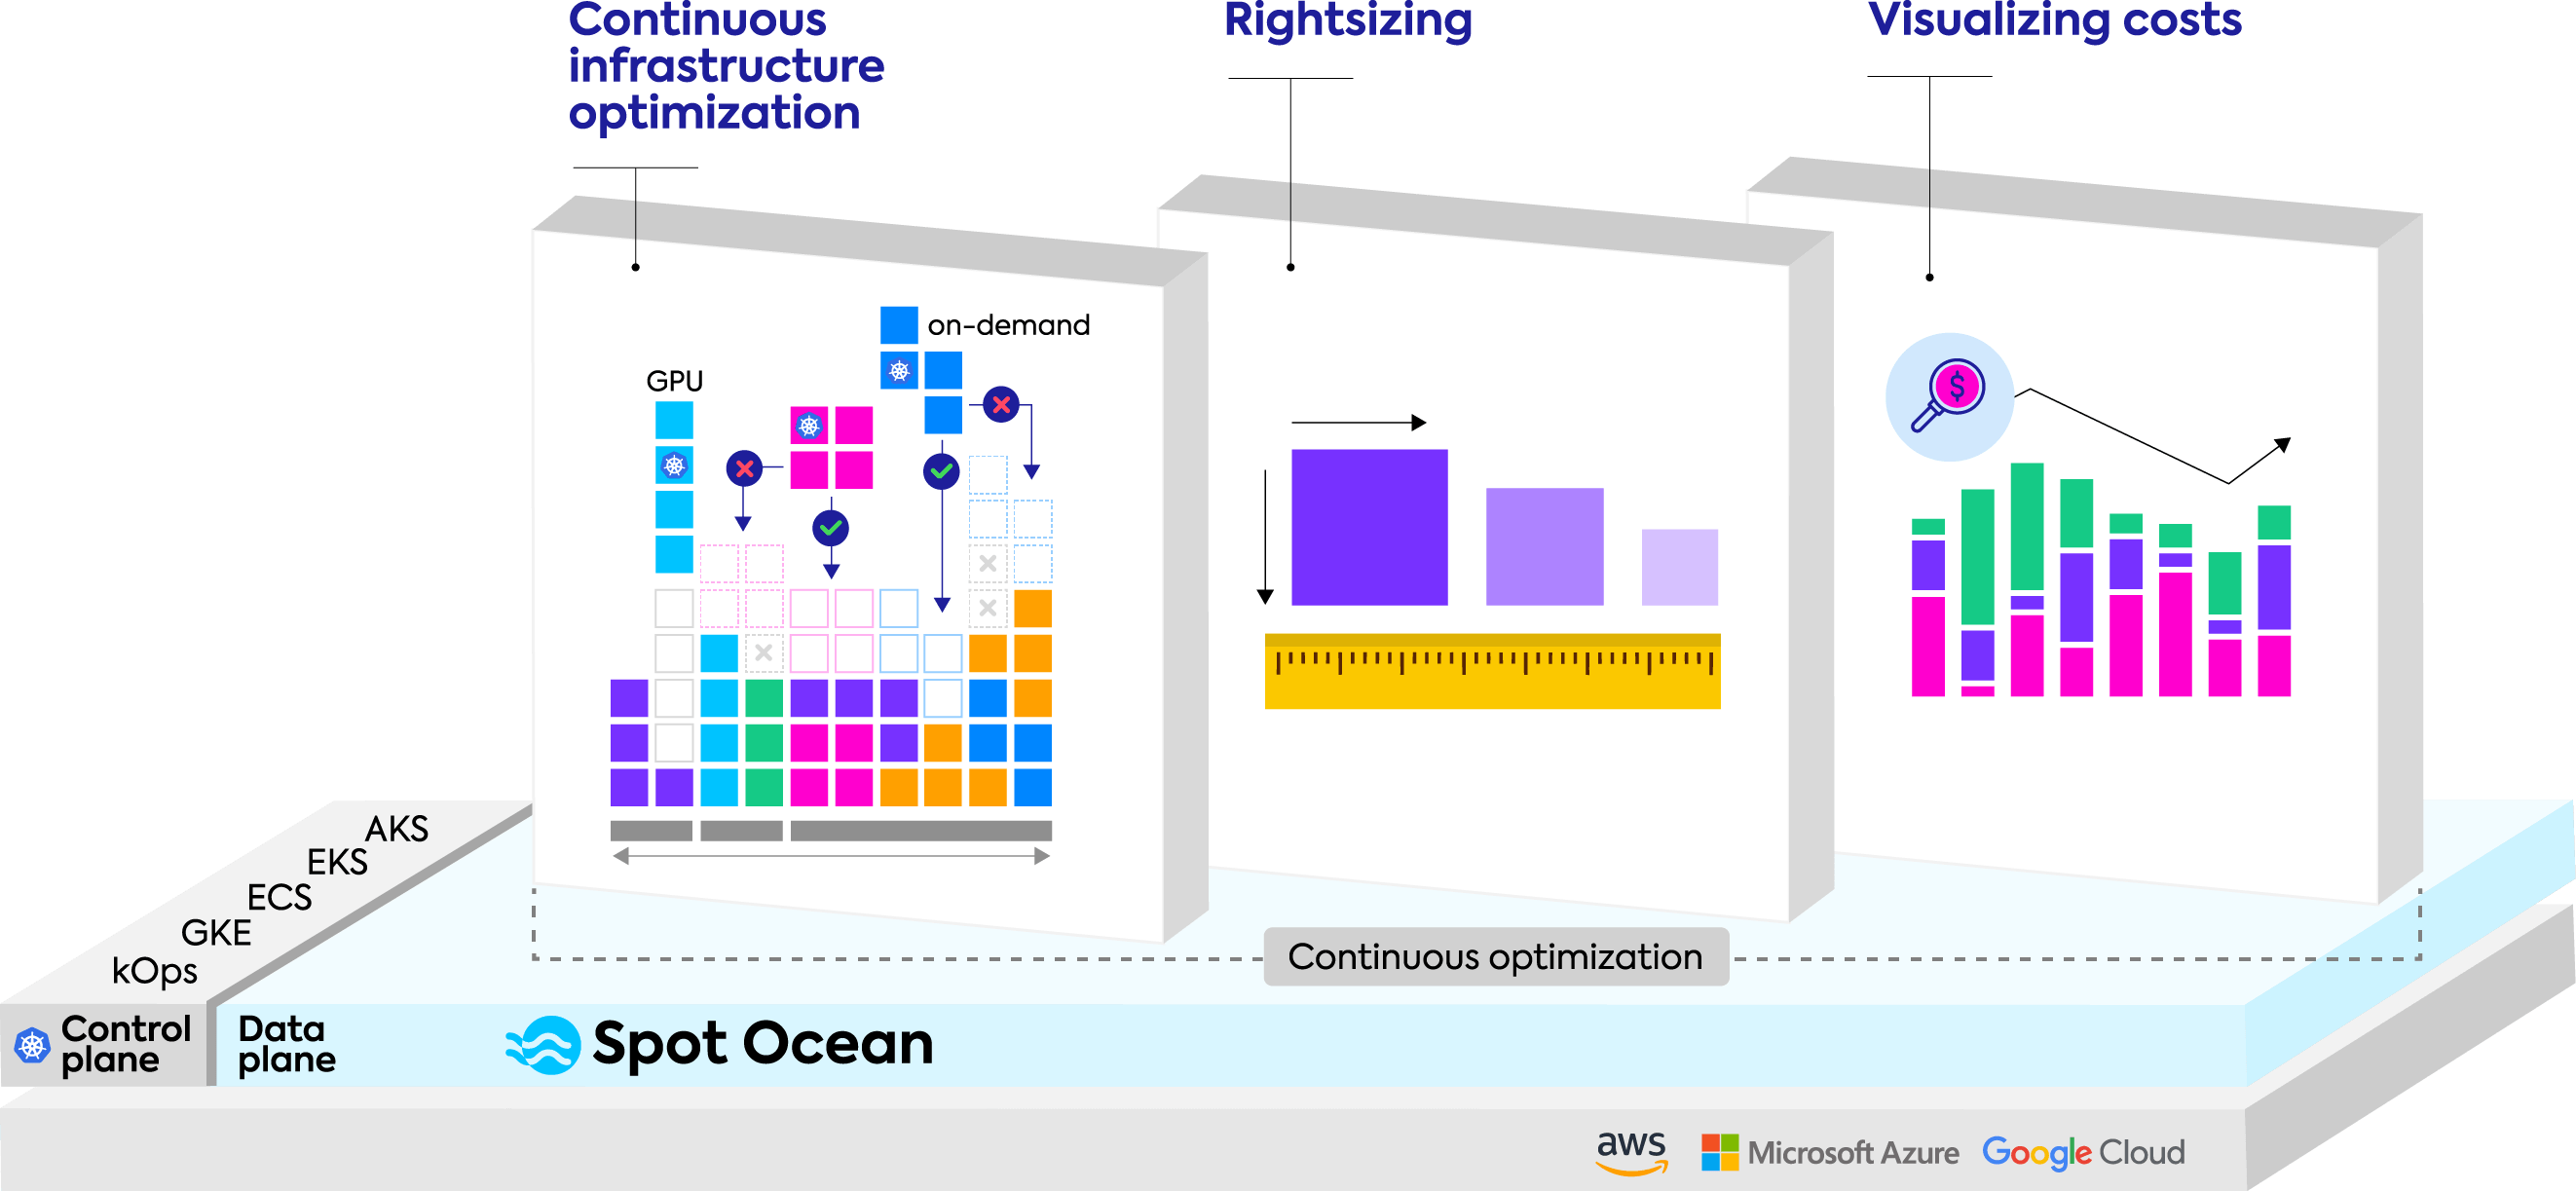
Get the optimal infrastructure for your containers
Streamline your Kubernetes infrastructure management while ensuring a continuous balance of cost, performance, and availability.
Kubernetes infrastructure optimization with Spot
Automate cost savings
Eliminate unexpected costs by automatically provisioning the optimal mix of instance types and pricing options for dynamic workloads.
Optimize container infrastructure
Automate scaling and sizing to ensure cloud-native applications get the ideal mix of resources they need – no more, no less.
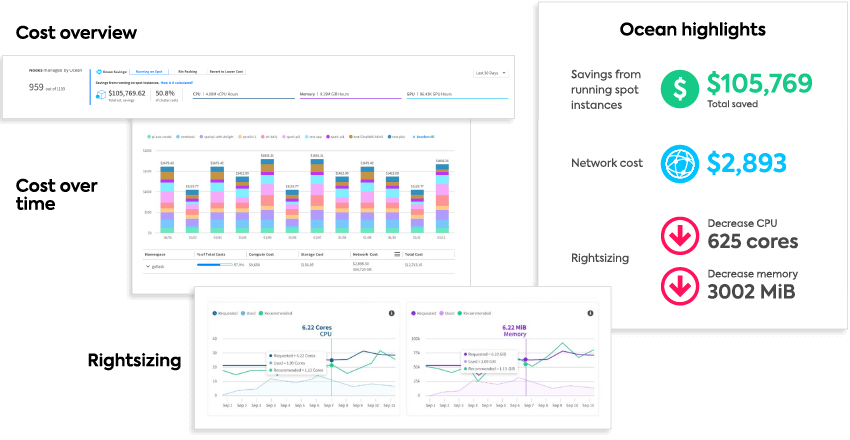
See and understand costs
Enable data-driven decisions and improve budget management through real-time, detailed insights into container utilization and costs.

Automating continuous optimization
Real results with Spot Ocean
“Thanks to Spot Ocean, cost optimization is now built into how we scale and manage our underlying infrastructure. Naturally, these cost savings are invested back in the business.”
“Autoscaling infrastructure was a black box for us but using Spot Ocean we don’t worry about it anymore. With Ocean, we didn’t need to develop something of our own, the cluster just scales up and down when it needs to.”
“Spot Ocean helped us implement optimization across the board… We were able to migrate most of our workloads to spot instances and therefore save greatly on our OpEx. Ocean brought our costs down by about 70%.”
Intelligent Kubernetes infrastructure optimization
Continuous cost optimization
Ensure the maximum performance for the lowest cost possible with application aware, AI-driven automated provisioning of resources, pricing models, and commitments.
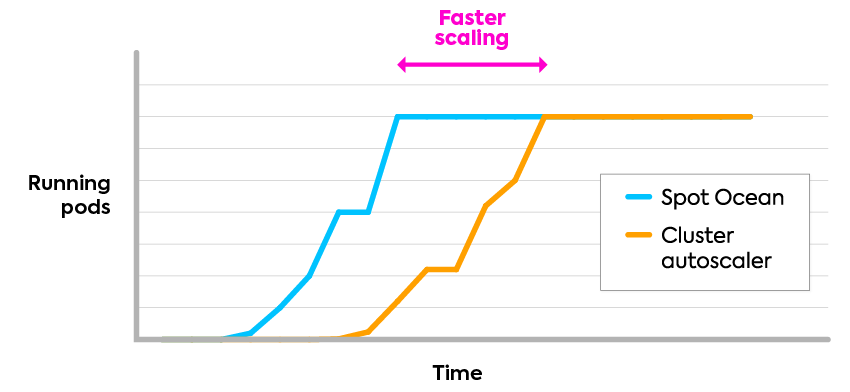
The fastest scaling
Respond in real-time to workload changes with Spot Ocean’s event-driven controller, enabling you to drive optimal resource allocation and performance without delay.
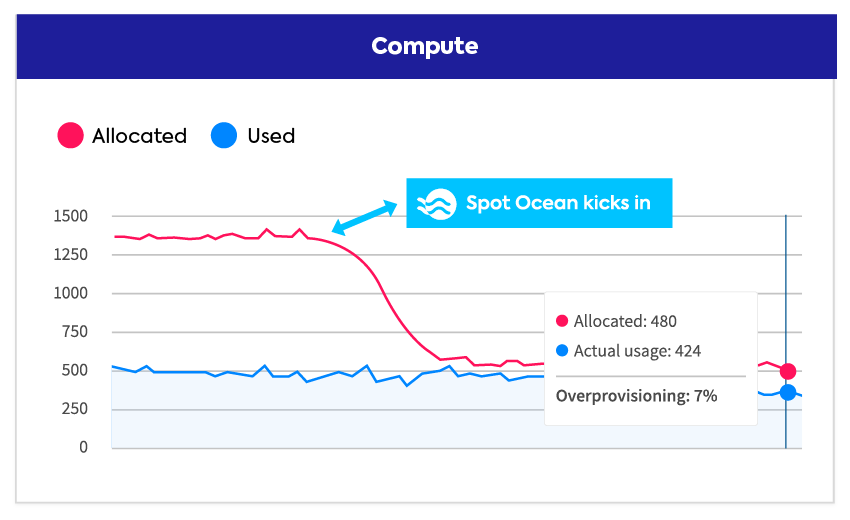
Exact automated rightsizing
Maximize utilization and efficiency with tailored recommendations and fully automated rightsizing of compute resources.
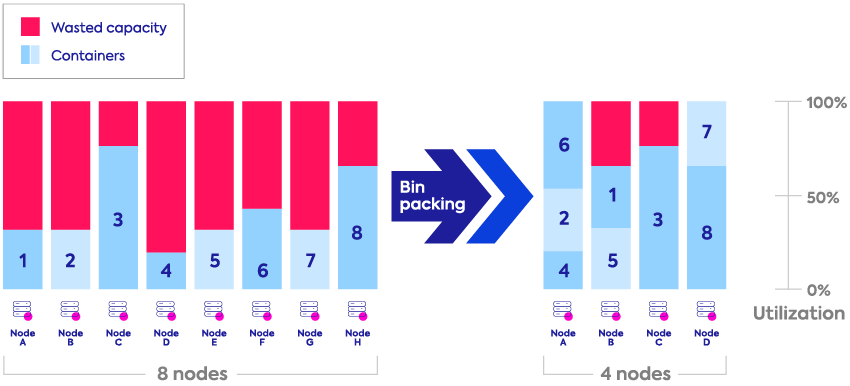
Nonstop bin-packing
Automatically place your containers in a way that optimizes resource utilization and minimizes wasted capacity.
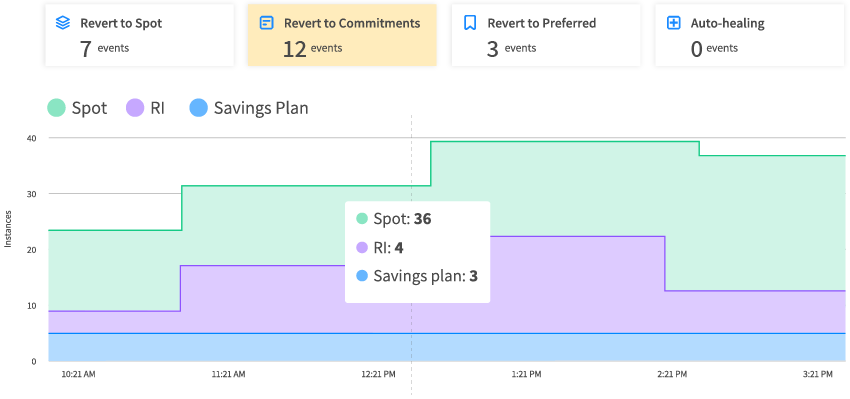
Maximized commitments utilization
Ensure your commitments are fully utilized before provisioning on-demand or preemptive instances.
Comprehensive cost analysis
Get insights across compute, storage, and network resources, while analyzing application costs and enabling chargeback, all without extensive resource tagging.
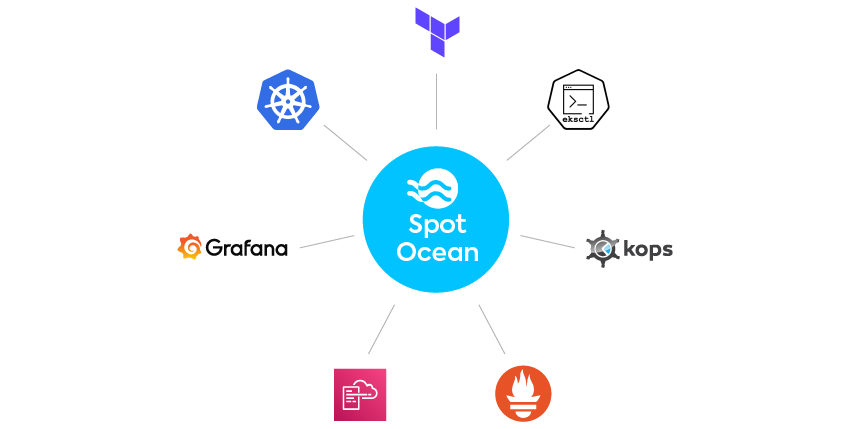
User customizable
Users can configure infrastructure parameters if desired via infrastructure-as-code tools like Terraform, kops, eksctl, CloudFormation and data analysis tools, as well as Ocean’s UI or API.