 Microsoft Azure
 Cloud Financial Management (FinOps)
 How to Operationalize FinOps

Businesses leveraging Microsoft Azure’s cloud infrastructure face distinct challenges centered around the complexities of cost management and infrastructure optimization. Designing a cloud environment that aligns with business needs and strict budgets requires not only a deep understanding of Azure’s vast offerings but also state-of-the-art automations to optimally leverage them. This includes selecting the right mix of compute, storage, and networking resources, and configuring them for maximum performance and utilization.
Without a robust AI-backed solution, this task is impossible to win – even for the most seasoned DevOps engineers. But “robust” can be very intimidating: lengthy, complex onboarding with high internal engineering engagement is where most enterprise SaaS solutions fail. Except one.
Where robust meets easy: Presenting Autopilot Migration
Spot is proud to present Spot Ocean for AKS: an enterprise-grade solution to optimizing AKS workloads for cost, resource efficiency, and performance.
For new and existing customers, Ocean offers a fully automated flow for migrating Kubernetes workloads from AKS-based nodes to Ocean nodes. This quick self-service process takes as little as 3 minutes to configure.
With enhanced visibility, validation, and automation, businesses can seamlessly transfer their native AKS workloads to Ocean and implement continuous optimization of their infrastructure across the board.
What can I migrate?
Any AKS workload, fault-tolerant or not, can be managed by the Ocean controller. If it’s not in Ocean yet, it should be!
Ocean is an end-to-end solution for autoscaling and optimizing your AKS workloads. Once you choose to migrate a workload or cluster into Ocean, it’s a set-and-forget. You can trust Ocean to smoothly grab the wheel, autoscale when needed, and safely run your cloud-native apps on the most efficient infrastructure, be it existing Reservations and Savings Plans, spot VMs, or on-demand machines.
Be in control all along
We know that trusting automation isn’t always easy — especially with something as precious as your core infrastructure. Therefore, Ocean provides an easy and transparent way to perform the workload migration, with an audit trail to let you fully control the process, using the Spot API or the user-friendly migration dashboard on the Spot console.
Here’s the process you can expect once you hit “Start migration”:
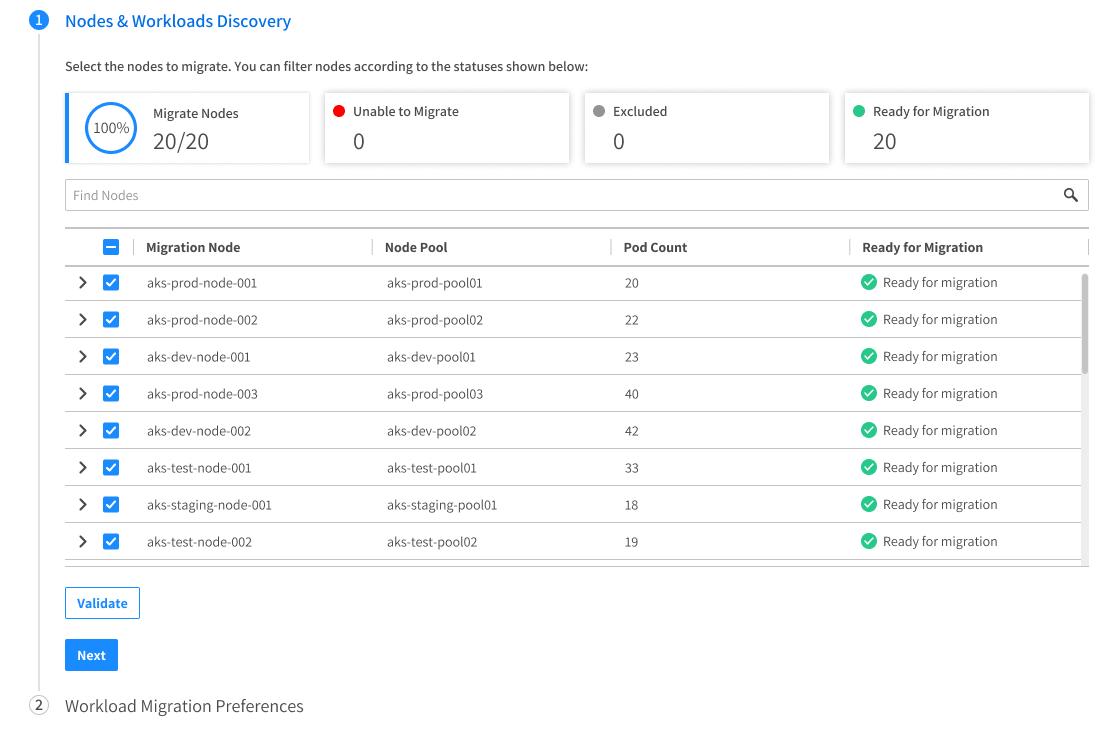
1. Overview
Ocean lists non-Ocean workloads for migration. This provides you with a clear overview of the tasks at hand.
2. Validation
Next, Ocean helps ensure low-friction migration: Highlighting any K8s restrictions on those workloads; validating a matching VNG to host those workloads, verifying an up-to-date K8s version. It also ensures that the Controller is valid and that spot-toleration exists for those pods.
3. Configuration
From there, set preferences into how the migration takes place (e.g., batch sizes, healthy definitions, and so on).
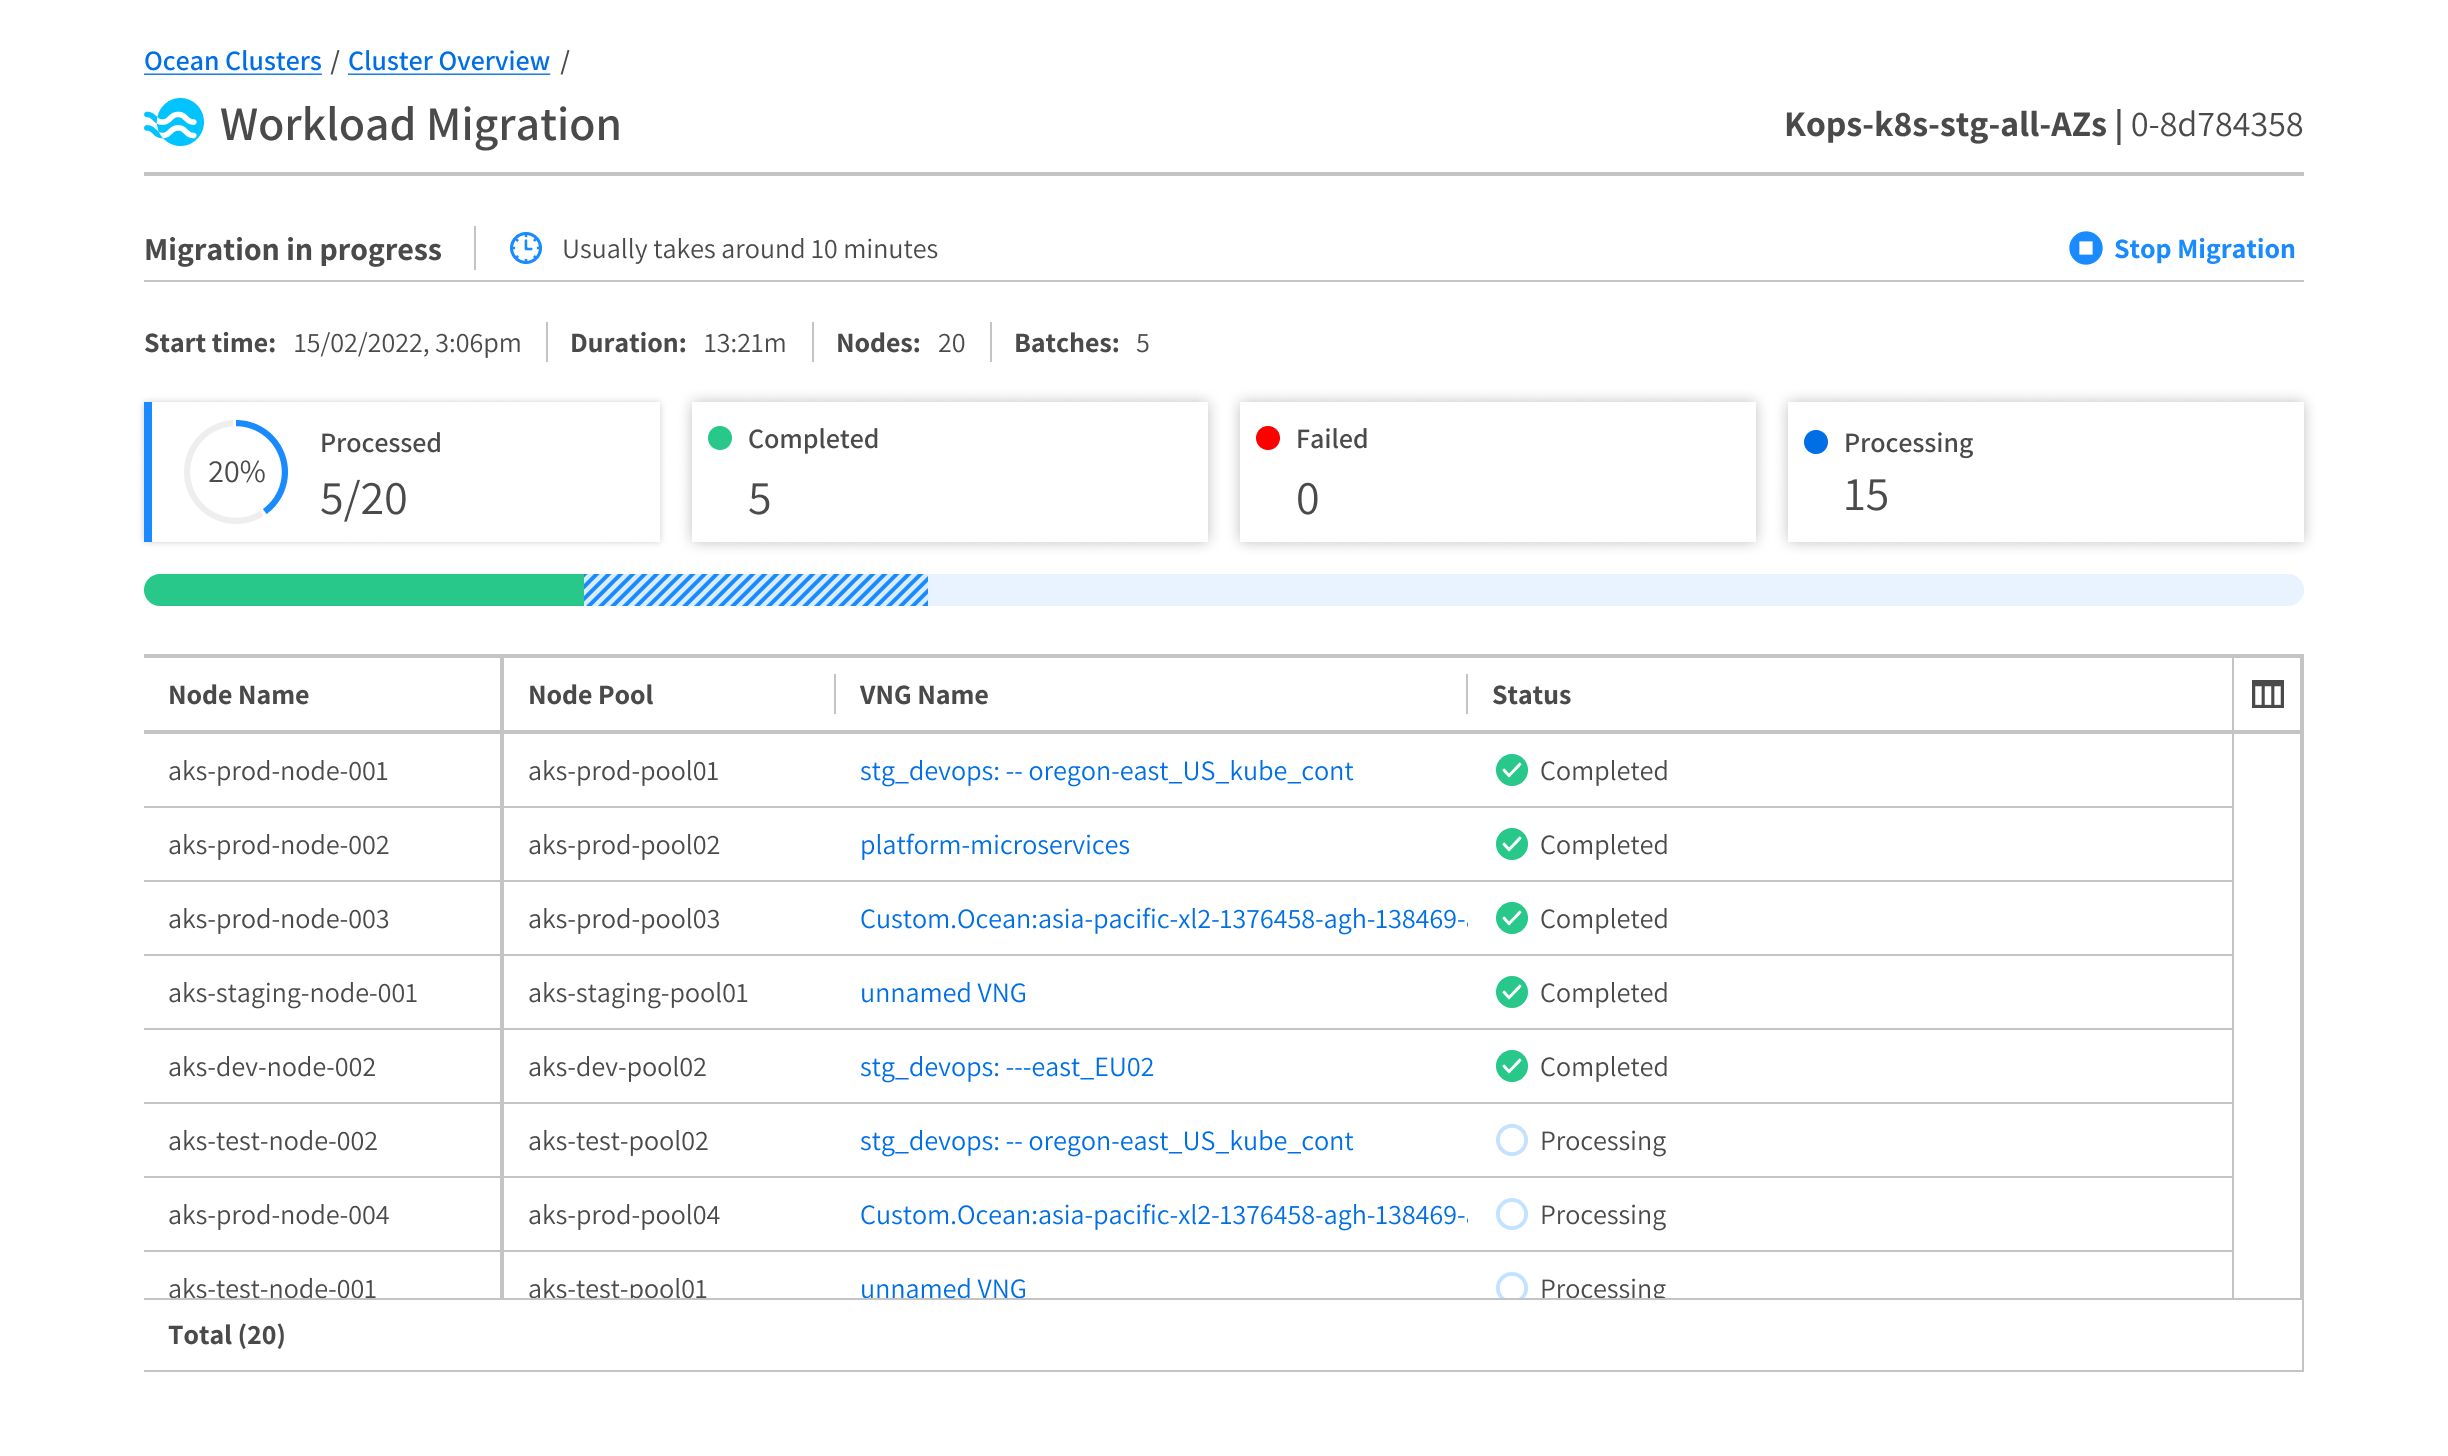
4. Auto-migration
Migration takes place – approximately 10 minutes per batch.
5. Log review
Once done, Ocean provides detailed migration logs. These logs will indicate successful migration or advise necessary adjustments to complete the migration for certain workloads, as detailed in this docs page.
6. Graceful draining
Finally, if selected, Ocean drains old AKS nodes.
With this level of transparency, customers can rest assured that their workloads have been successfully migrated and are ready to operate in the Ocean environment.
Sounds good! How do I get started?
- If you’re new to Spot and Ocean, start by opening a free account with this quick tutorial
- Next, access your Ocean cluster and navigate to the “Start Migration” section.
- Review the auto-generated list of Nodes & Workloads that are not in Ocean yet.
- Select the nodes you wish to migrate to Ocean.
- Look for the green status indicating that their running workloads are “Ready for Migration”.
- Start the migration process.
For detailed steps, screenshots, and troubleshooting, refer to the official documentation.